
Odoo
Odoo is a suite of open source business apps that cover all your company needs: CRM, eCommerce, accounting, inventory, point of sale, project management, etc.
The Odoo add-on enables seamless integration of WordPress forms with Odoo’s various modules, including contacts, leads, quotations, and sales orders.
The add-on
Odoo is usually extended internally via modules, but many of its features and all of its data are also available from the outside for external analysis or integration with various tools. Part of the reference/orm/model external API is easily available over JSON-RPC and accessible from a variety of languages.
To talk with this API, the add-on works with an extension of the generic REST bridge class that implements JSON RPC calls. To work properly, the add-on’s bridges requires a RPC authentication credential.
An Odoo bridge will integrate your form submissions with the database of your ERP. The addon comes with a suit of templates and workflow jobs to bridge forms to the Partners, CRM, Sales, Meetings and Mailing lists modules, but you’re not tied to this options: either via templates or via manual set up, you can configure your bridges to target any module exposed via RPC, whether it is a core module or a custom one.
If your are using commercial plans from odoo.com, the external API may not be available.
Access to data via the external API is only available on Custom pricing plans. Access to the external API is not available on One App Free or Standard plans. If that is your case, check your plan before you install Forms Bridge.
How to use
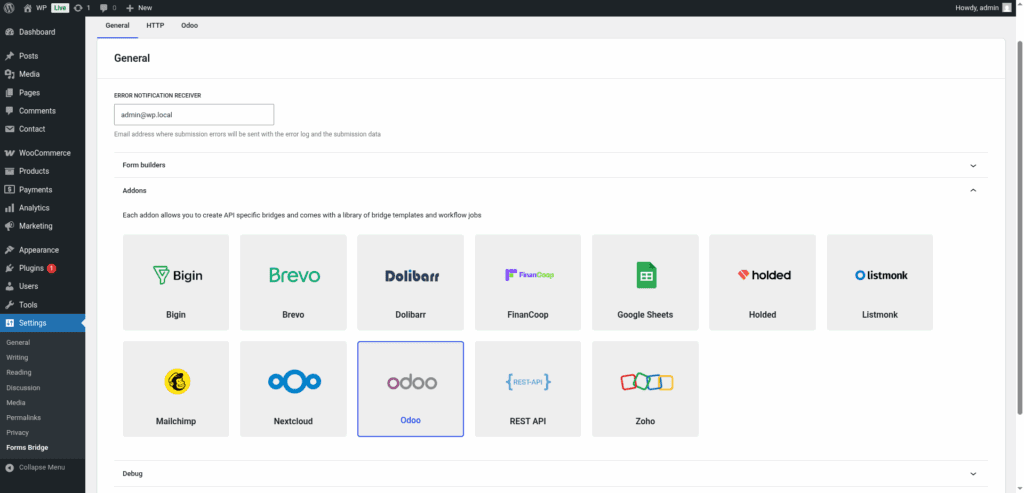
The first step to use the add-on is to activate it on the add-ons table on the general settings tab.
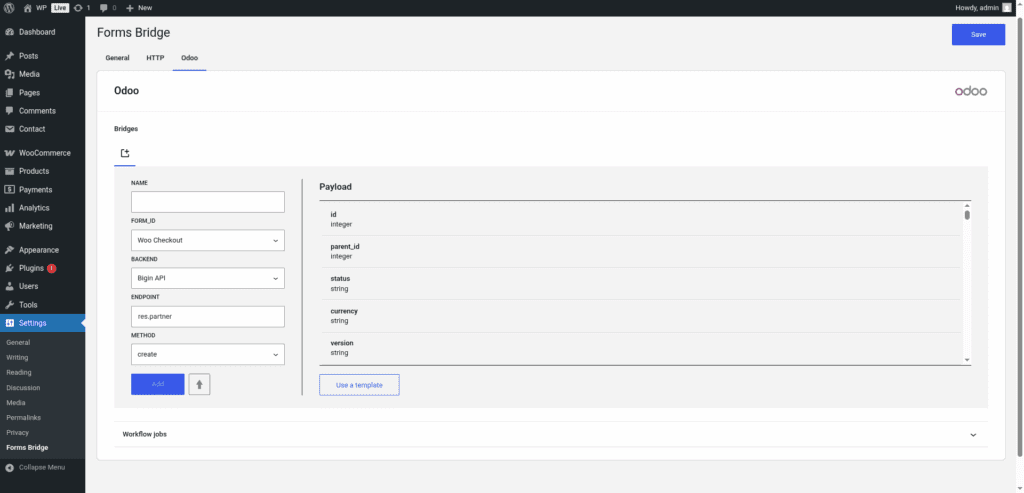
Once activated, a new tab will be visible on the settings page. If it’s your first time, it should looks like this:
The template wizard
The recommended way to set up a new bridge is to use a template as a starter point. The add-on’s template wizard will set up a new RPC credential, a backend connection and a form, all of them linked on a new bridge.
With this setup ready, you can edit the bridge’s form to fit your module’s requirements or manually add new forms and bridge them with the backend / credential you’ve configured on the previous step.
The template wizard will lead you through four steps:
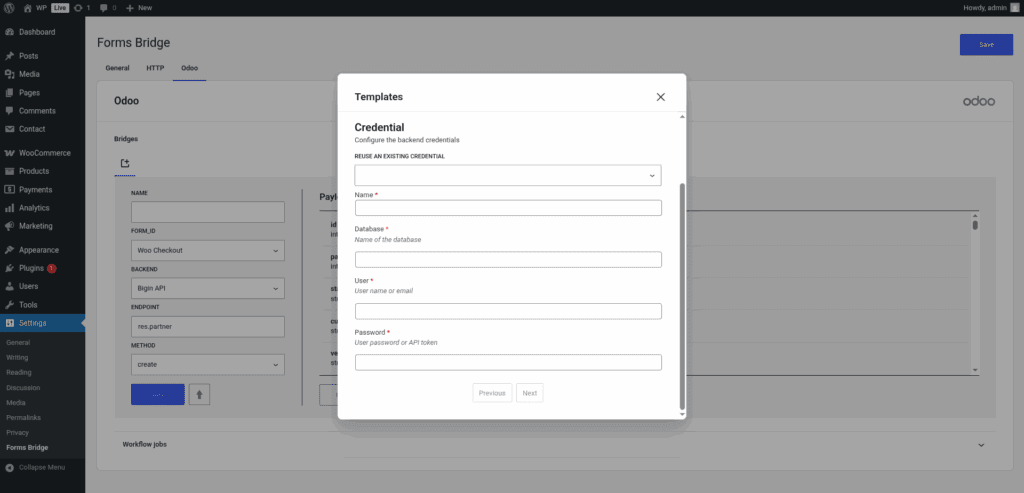
1. Credential
On this step, Forms Bridge will register a new RPC credential. The RPC protocol requires authentication for each API call. To pass this authentication check, the add-on’s bridges requires a credential. These credentials consists of three values:
- Database: The name of the database you want to connect with. Odoo can work with multiple database on a single instance. To get the name of your database, go to Settings > General Settings on the admin UI and activate the developer mode. Once activated, the database name will be visible just below your user name, on the right top corner of the screen.
- User login: The user login with which you want Forms Bridge to be authenticated. You can create a dedicated user or use an existing one, up to you. The login is usually an email address.
- Password: The password of the user. Here you can use the user password, or create an API key for this purpose. To create the token you have to go to Account > Preferences > Account Security and click on the New API key button. See the official documentation for more information about API keys.
Once you have your credentials, you’ve to fulfill the wizard’s credential step with the database, the user login and the password, in addition to a unique name to identify the new credential.
If you already have a RPC credential registered, the template wizard allows you to reuse it. If you want to get multiple bridges, the recommended way to proceed is to register a Bearer credential and reuse it on your bridges.
2. Backend
The backend step requires a unique name to identify the new backend connection and the base URL of your Odoo instance.
If you already have a RPC credential registered, the template wizard allows you to reuse it. If you want to get multiple bridges, the recommended way to proceed is to register a RPC credential and reuse it on your bridges.
3. Form
In this step you have to choose the title of the form the template are going to create. If there is a compatible form, the wizard allows you to reuse the existing form and skip the form creation.
4. Bridge
On the last step of the wizard, you have to set a unique name for the new bridge. In addition to the name, and depending on the template you are using, this step will require more or less fields to be informed. The required fields will be marked with a red asterisk
After that, click on submit and Forms Bridge will generate the credential, backend, form and bridge setting. It only remains to publish the new form on a public page and wait for a new form submission!
Manual set up
With templates, you can save a lot of time while configuring your bridges, but you can achieve the same result with a manual set up.
An Odoo bridge will require the following components:
1. Credential
As mentioned before, the Odoo’s external API is an RPC API protected with authentication. To solve this authentication requirement, the add-on requires you to register a RPC type of credential. These kind of credentials consists of three values:
- Database: The name of the database you want to connect with. Odoo can work with multiple database on a single instance. To get the name of your database, go to Settings > General Settings on the admin UI and activate the developer mode. Once activated, the database name will be visible just below your user name, on the right top corner of the screen.
- User login: The user login with which you want Forms Bridge to be authenticated. You can create a dedicated user or use an existing one, up to you. The login is usually an email address.
- Password: The password of the user. Here you can use the user password, or create an API key for this purpose. To create the token you have to go to Account > Preferences > Account Security and click on the New API key button. See the official documentation for more information about API keys.
Once you have the required information, you have to go to Settings > Forms Bridge > HTTP > Credentials on your WordPress admin page and register a new authentication credential.
Select RPC as the authentication schema and fulfill the user login, password and database fields with the corresponding values.
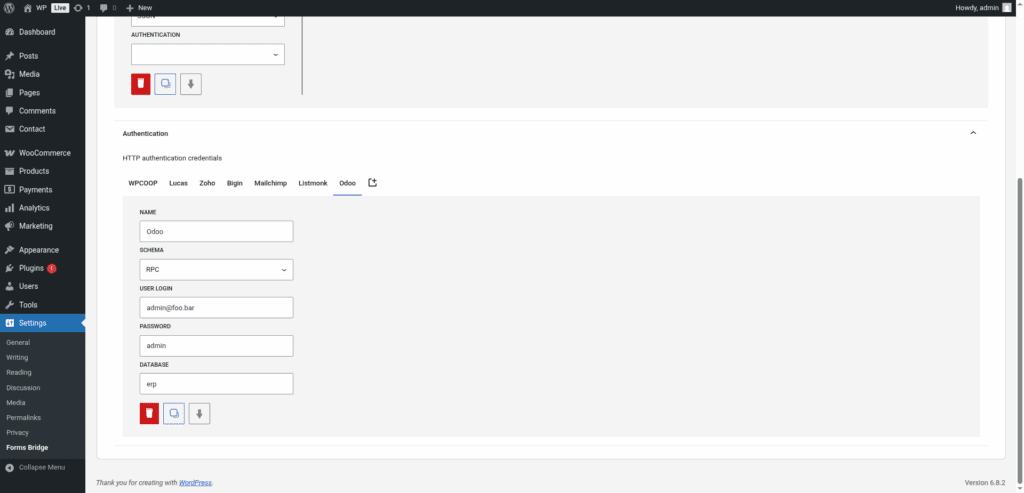
This is an example of a RPC authentication credential. In your case, the credential fields will be diferent based on your user credentials and instance database name.
2. Backend
To configure the Odoo’s RPC API as a backend follow this steps:
- Register a new backend with a unique name (Odoo RPC, for example)
- Set the base URL of your ERP instance as the connection URL
- Select
JSONas the Encoding Schema - Add
Acceptas an HTTP header withapplication/jsonas value. - Select the RPC credential you’ve configured on the previous step
3. Form
Get your preferred form builder and create a new form. Once created, you can choose it as the target form to be bridged on the bridges panel of the addon. If your form fields does not match the desired API module’s layout, you can use bridge’s field mappers to rename them.
4. Bridge
The addon’s bridge is an extension of the generic REST bridge that implements RPC calls. Like the REST bridge, the addon’s bridge requires a unique name, a backend and a form, but instead of an endpoint and an HTTP method, the bridge requires a model name and a RPC method.
The model have to match one of the available models on your instance. To get a comprehensive list of your instance available models, you have to go to Settings > Technical > Models on the Odoo’s admin UI. For example, to get your contact forms bridged with the contacts modules, you have to set the model field to res.partner.
The bridge allows you to use multiple RPC methods (search, read, write, create, etc). In most cases you only want to use the create method as it is the way you write entries on the database through the RPC API.
Troubleshooting
To troubleshooting your bridges you can use the plugin’s debug console from the General Settings page. Enable the debug mode and submit a sample form response to see what’s going on under the hood. Take a look to our tutorial about how to use the debug console.
Common issues
- Authentication failures
- Verify you’re not in a commercial plan without access to the RPC API
- Verify the RPC credentials and database name
- Confirm the backend URL
- Missing data
- Validate field mappings
- Validate module-specific layouts
Templates
The addon comes packed with the following templates:
Appointments 🔎
Appointments form template. The resulting bridge will convert form submissions into events on the calendar linked to new contacts.Company Contacts 🔎
Contact form for companies template. The resulting bridge will convert form submissions into new companies linked to contacts.Company Quotations 🔎
Quotations form template. The resulting bridge will convert form submissions into quotations linked to new companies.Contacts 🔎
Contact form template. The resulting bridge will convert form submissions into contacts.CRM Company Leads 🔎
Leads form template. The resulting bridge will convert form submissions into leads linked to new companies.CRM Leads 🔎
Lead form template. The resulting bridge will convert form submissions into leads linked to new contacts.CRM Team Leads 🔎
Team lead form template. The resulting bridge will convert form submissions into leads linked to new contacts.Helpdesk ticket 🔎
Convert form submissions to helpdesk ticketsJob position 🔎
Job application form. The resulting bridge will convert form submissions into applications to a job from the Human Resources moduleMailing Lists 🔎
Subscription form template. The resulting bridge will convert form submissions into subscriptions to mailing lists.Quotations 🔎
Quotations form template. The resulting bridge will convert form submissions into quotations linked to new contacts.Delivered Orders 🔎
Sale order bridge template. The resulting bridge will convert WooCommerce orders into product delivered sale orders linked to new contacts. To work properly, the bridge needs that you use your Odoo’s product internal refrence as the WooCommerce product sku values.Delivered Orders + Sync 🔎
Sale order bridge template. The resulting bridge will convert WooCommerce orders into product delivered sale orders linked to new contacts. The template includes a job that synchronize products between WooCommerce and Odoo by product refs.Sale Orders 🔎
Sale order bridge template. The resulting bridge will convert WooCommerce orders into product sale orders linked to new contacts. To work properly, the bridge needs that you use your Odoo’s product internal refrence as the WooCommerce product sku values.Sale Orders + Sync 🔎
Sale order bridge template. The resulting bridge will convert WooCommerce orders into product sale orders linked to new contacts. The template includes a job that synchronize products between WooCommerce and Odoo by product refs.
Odoo is a modular system and the RPC API may change in base on what modules are enabled on the instance.
Workflow jobs
The addon comes packed with the following workflow jobs:
Appointment attendees 🔎
Search for partner by email or creates a new one and sets it as the appointment attendee. If user_id, also adds user as attendee.Appointment dates 🔎
Sets appointment start and stop time from “timestamp” and “duration” fields.Attachments 🔎
Gets submission uploads and sets them as attached files to the newly created modelCandidate 🔎
Creates a recruitement candidate and sets its ID as the candidate_id field of the payloadContact’s company 🔎
Creates a company and sets its ID as the parent_id of the payloadContact 🔎
Creates a contact and sets its ID as the partner_id field of the payloadCountry ID from code 🔎
Given a iso2 code code gets the internal country IDCRM lead contact 🔎
Creates a new contact and sets its email as the email_from and its ID as the partner_id on the payloadShipping address 🔎
Creates a shipping address linked to a contact.Skip subscription 🔎
Search for a subscribed mailing contact, updates its subscriptions and skips if succeedProducts by reference 🔎
Search for products on Odoo based on a list of internal references and returns its IDs.Skip if contact exists 🔎
Search contacts by name, email and vat and skip submission if it existsState ID from code 🔎
Given a iso2 country code code and a state odoo code gets the internal state IDSync woo products 🔎
Search for products from the WooCommerce order by sku on Odoo and creates new ones if someone does not existsPrefixed vat ID 🔎
Prefix the vat with country code, or the current locale, if it isn’t prefixedFormat date fields 🔎
Gets date, hour and minute fields and merge its values into a date with format Y-m-d H:M:SISO2 country code 🔎
Gets the ISO2 country code from country names and replace its valueISO3 country code 🔎
Gets the ISO3 country code from country names and replace its valueSkip submission 🔎
Skip submission if condition is not truthy
Supported form builders


Tutorials
-
Bridge WooCommerce orders with Odoo
In this tutorial we will explain how to bridge your WooCommerce orders to Odoo. The resulting bridge will convert placed orders in WooCommerce to sale orders on the sales module linked to new partners
-
Using the Odoo quotations template
In this tutorial we will explain how to bridge your WordPress forms to Odoo to set up a transactional form that creates product quotations. The resulting bridge will create a partner, and a new quotation linked to the former and with a product line with unit price and quantity. This tutorial assumes you have an…