
In today’s digital ecosystem, organizations often rely on multiple platforms to manage different aspects of their operations. For example, you might use Odoo as your CRM to handle customer relationships and sales, while Listmonk manages your email marketing and newsletters. The challenge arises when you want to streamline data collection—such as quotation requests—so that submissions are automatically sent to both systems without manual intervention.
With Forms Bridge, you can connect one form to multiple backends, allowing your submissions to be sent to multiple places simultaneously.
Let’s explore how to set up this integration step by step, using Contact Form 7 as the form builder, Odoo as the CRM, and Listmonk as the newsletter service.
Quotation form
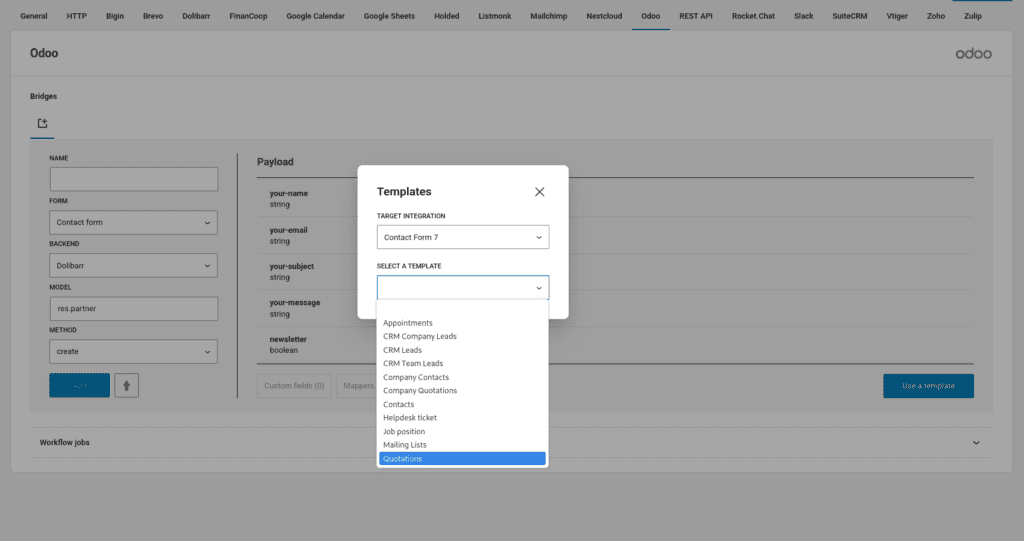
The first step is to build the quotation form. For this, we’ll use Contact Form 7 as the form builder and the Odoo Quotation template as a starting point. Go to the Odoo add-on, open the template wizard, select the Quotations template, and follow the wizard steps. At the end, Forms Bridge will have created a new form, a backend connection, and a bridge.
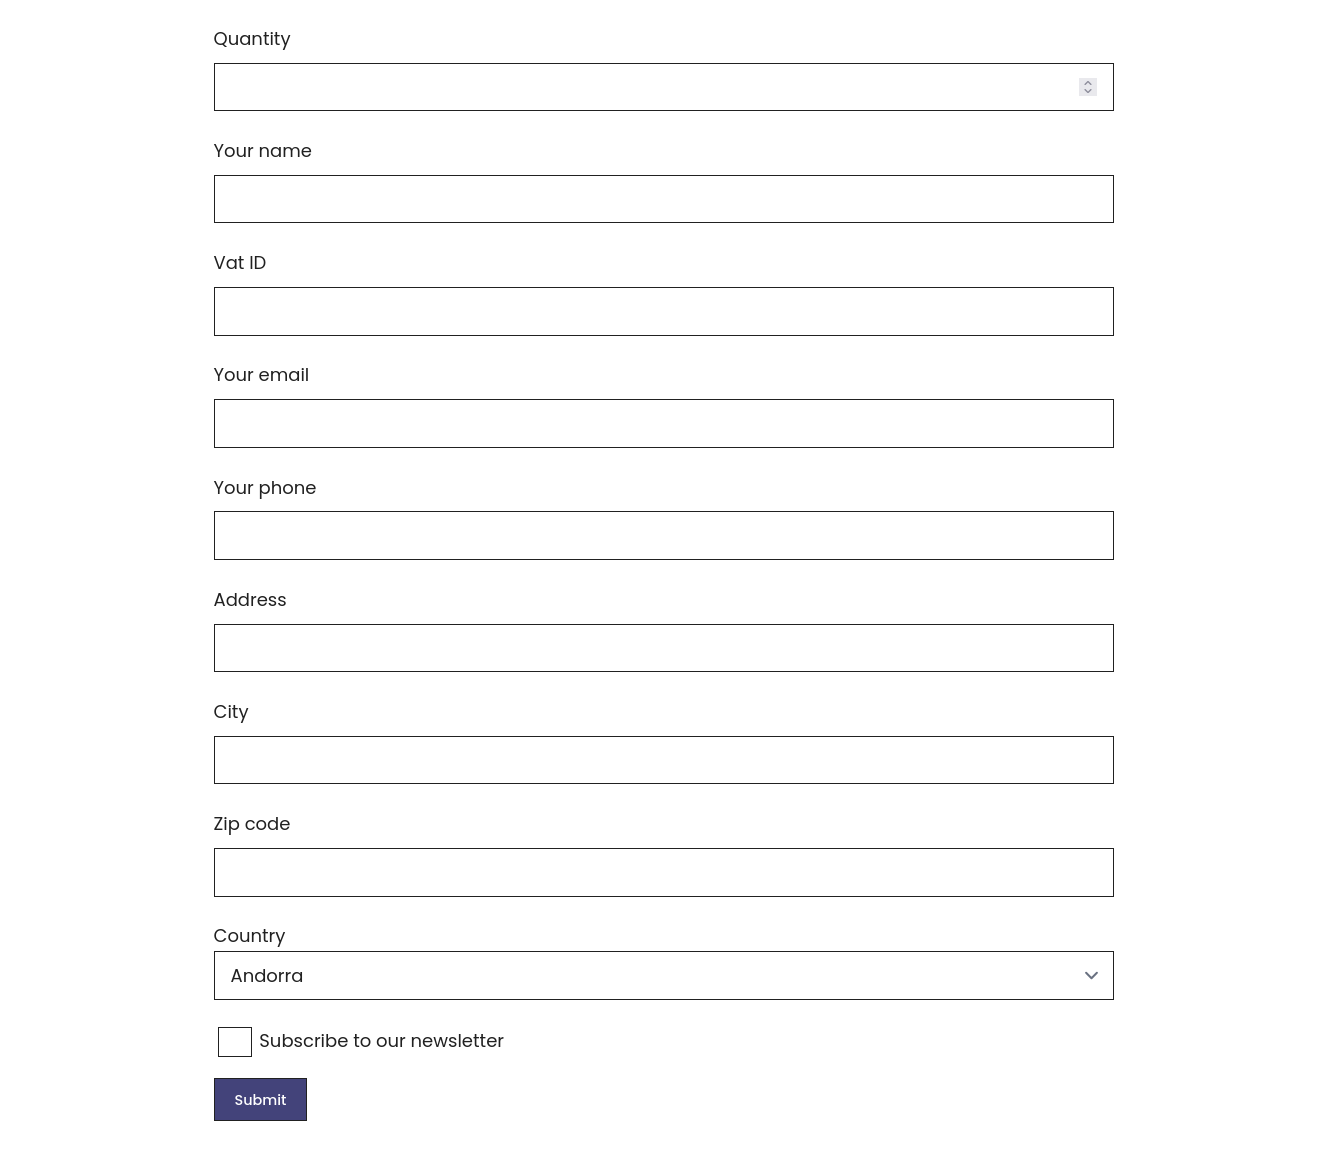
To the resulting form, we need to add one more field named listmonk as an acceptance checkbox. This allows visitors to subscribe to our newsletter.
After this small change, the form will look like this:
Odoo
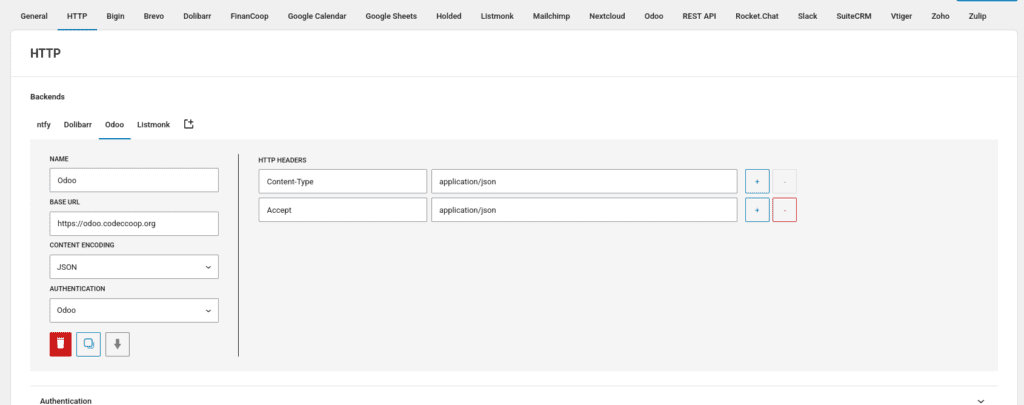
Since we used the wizard template to create the bridge, the backend connection to Odoo is already configured. This connection consists of two components:
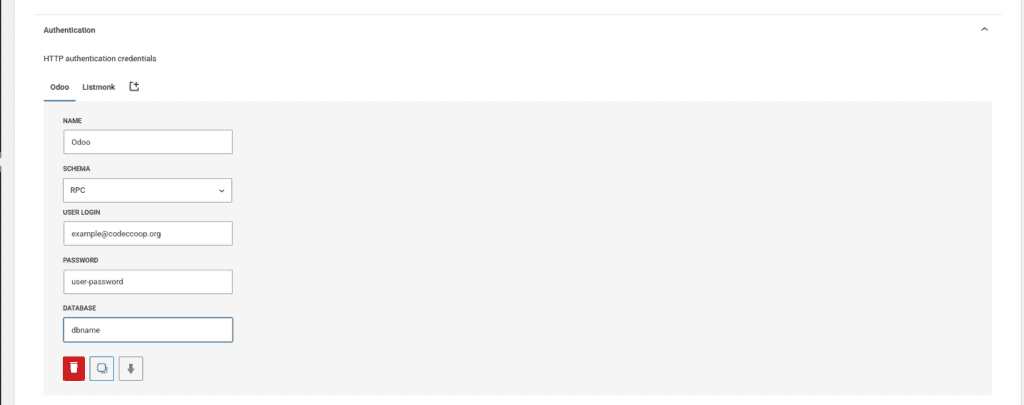
- RPC Credential: An authorization credential with three fields: the user’s email, its password and the name of the target database.
- Backend: A backend connection with the base URL of our Odoo instance, some HTTP headers, and the link to the RPC credential.
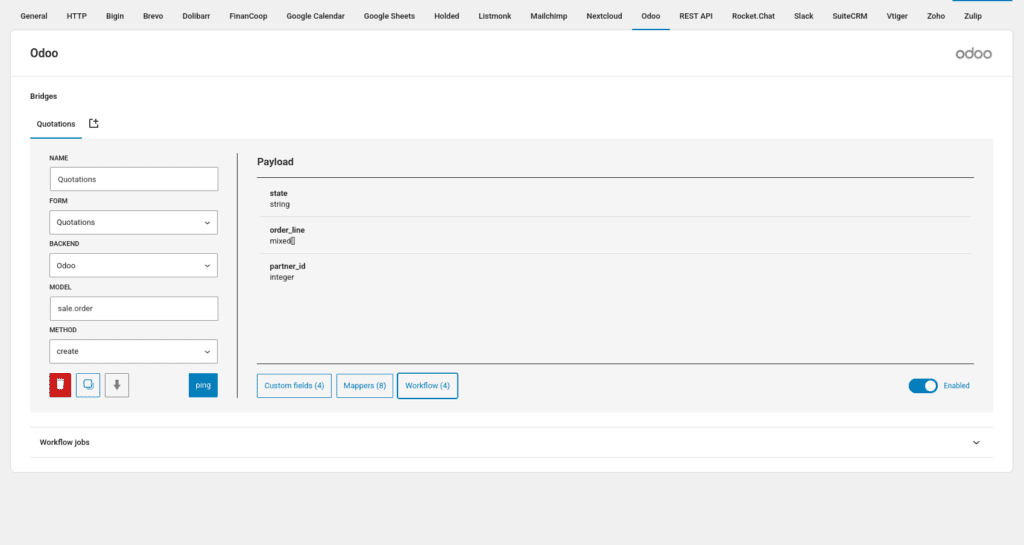
In the Odoo tab of the settings page, we’ll find the bridge. Because we added a new field to the form, we need to use mappers to ignore it. After this, the bridge should look like this:
Listmonk
To set up the Listmonk integration, we need to configure the backend connection. The first step is to create an API user in Listmonk and obtain its token.
The Listmonk API uses authorization tokens, so the next step is to register a new Token credential. Use the username and token as the client id and client secret values.
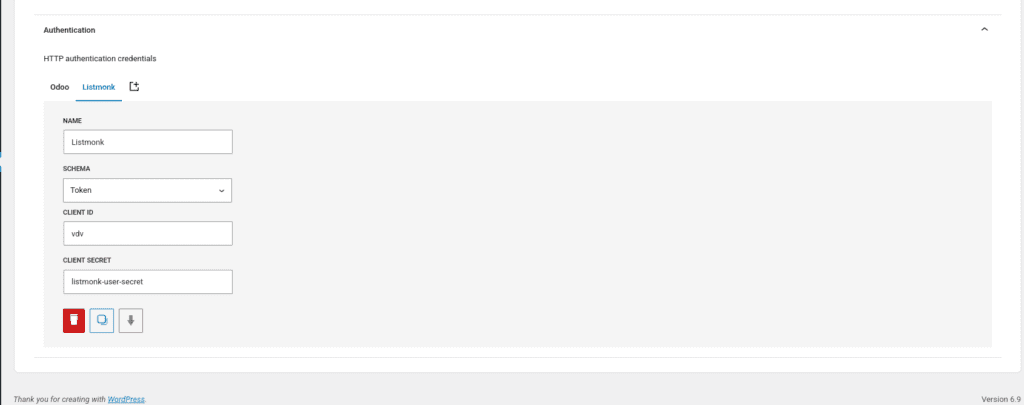
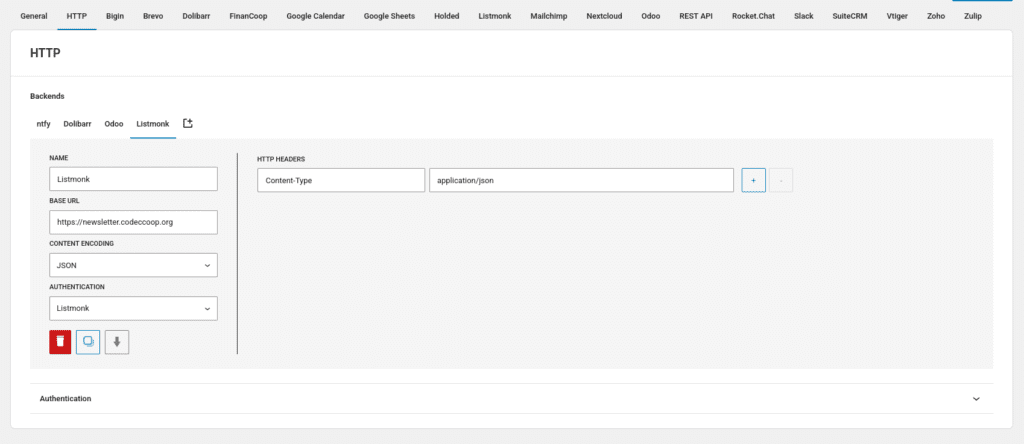
Once registered, we have to configure the backend connection using the base URL of our Listmonk instance and the Token credential we created.
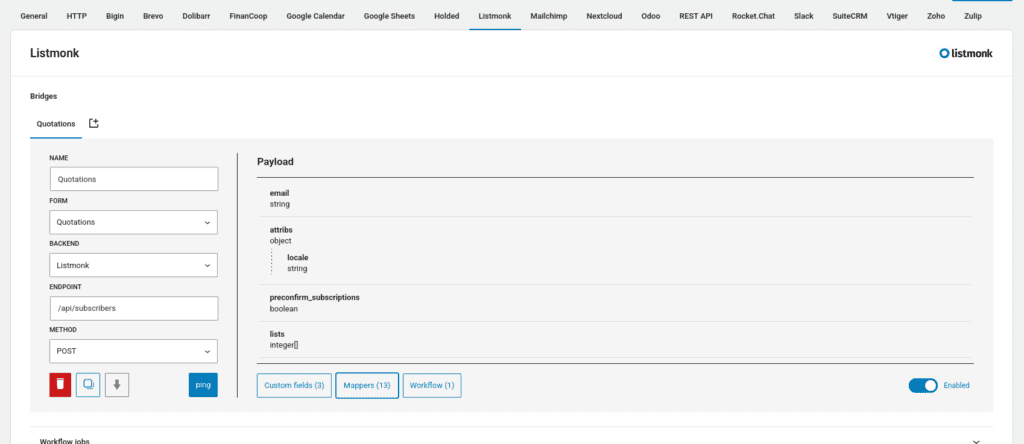
Next, go the the Listmonk tab and register a new bridge. This bridge should include the following fields:
- Name: Quotation subscriptions
- Form: Quotations
- Backend: Listmonk
- Endpoint:
/api/subscribers - Method:
POST
And the following custom fields:
- attribs.locale:
$browser_locale - preconfirm_subscriptions: 1
- lists[0]: 1 (this is the ID of the list we want our visitors to be subscribed)
Use mappers to ignore unrelated fields (e.g. vat, street, etc.) and to format the payload to match the Listmonk subscribers endpoint interface. Here’s the result:
The final step is to add the Skip subscription job to the bridge workflow. This job will skip bridge submissions if the listmonk field is not set to true in the payload. With this job, the bridge will skip subscription requests for users who haven’t accepted the subscription.
Conclusion
After all this work, we have one form built with Contact Form 7 and two bridges: one for our CRM and another for our mailing list service.
With this setup, each submission from the quotation form will trigger two simultaneous requests:
- An RPC call to Odoo to create a new contact and quotation
- An REST request to Listmonk to create a new subscriber for our mailing list.
This examples covers a dual form integration, but it can scale up to any number of parallel integrations.