
In this tutorial, we will explore a new use case for Forms Bridge: integrating it with the workflow automation tool n8n.
What is n8n?
n8n is a low-code, source-available, self-hostable alternative to Zapier. It is an excellent choice for technical teams looking to build complex workflows quickly. Like Zapier, n8n enables users to automate repetitive tasks and connect various applications without requiring advanced coding skills. Its visual interface simplifies the workflow-building process, making it easy to schedule tasks and transfer data between different applications.
Why to integrate Forms Bridge with n8n?
While Forms Bridge offers its own workflow system, allowing you to configure payload processors and automations through a visual editor running entirely on your WordPress backend as a chain of PHP functions, it is somewhat limited compared to a fully featured tool like n8n. By integrating Forms Bridge with n8n, you can leverage the strengths of both systems for enhanced functionality.
Setting up n8n
To achieve this integration, we will use Webhooks. Webhooks are a type of n8n node that allows your workflows to bind triggers to real-time events from external services based on HTTP requests.
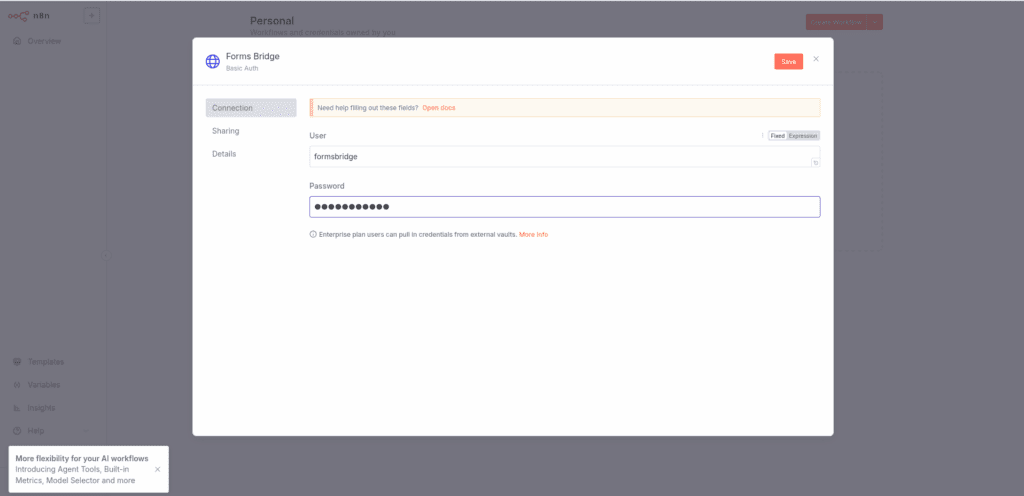
1. Configure a new credential
- Navigate to the Credentials tab and create a new credential.
- In the credential types selector, choose Basic Auth.
- Fill in the User and Password fields to create a new user for Forms Bridge. Remember this password, as it will be needed in the following steps.
Using Basic authentication helps protect your webhook. This step is optional; you can leave your webhook public or choose other authentication methods, such as JWT Auth or Header Auth.
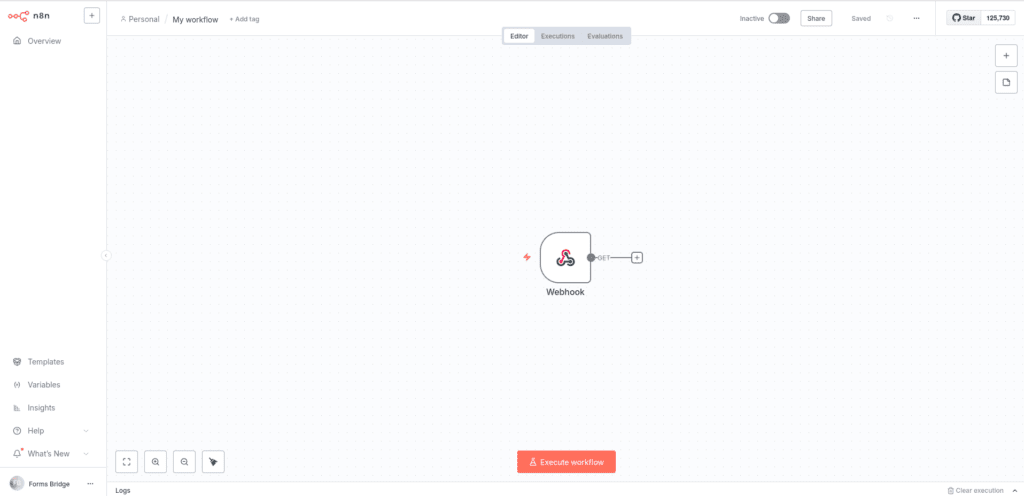
2. Create the workflow
Next, create your workflow:
- Navigate to the Workflows tab and click on Create Workflow. This will open the workflow canvas.
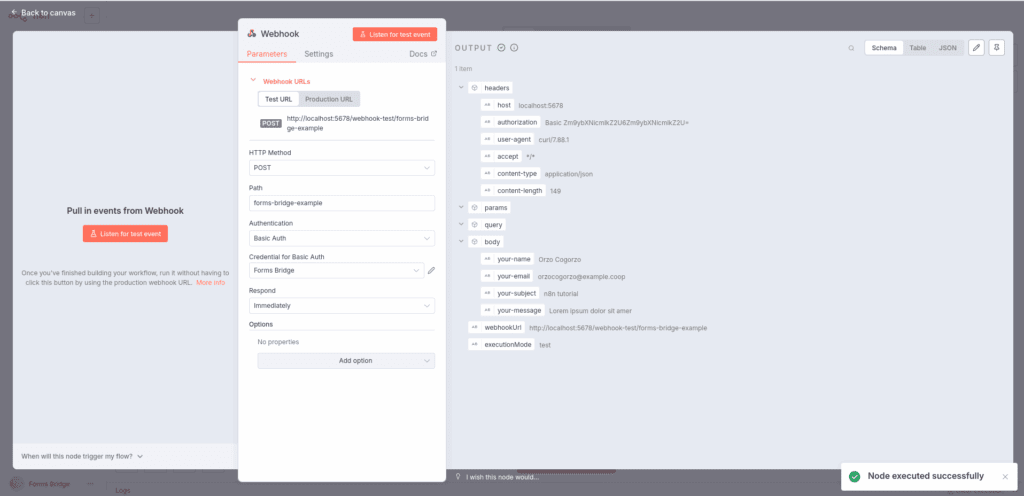
- The first step of your workflow should be a Webhook node. Click on Add first step and search for Webhook.
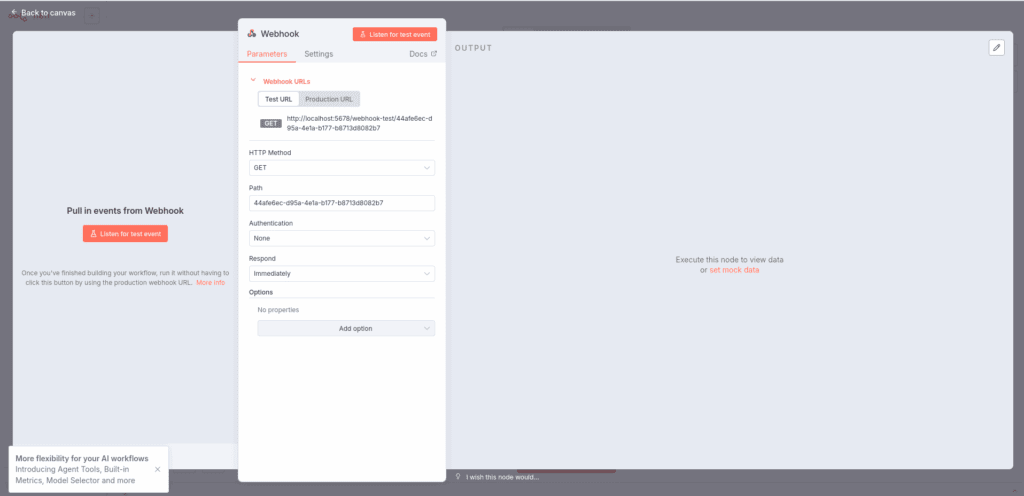
In the node panel, configure the following settings:
- HTTP Method: POST
- Path: forms-bridge-example
- Authentication: Basic Auth
- Credential for Basic Auth: The credential you set up earlier
- Respond: Immediately
Once configured, you need to feed the webhook node with a sample payload. To do this, set up Forms Bridge before continuing with the workflow setup.
Before you leaving n8n, open the node panel again and click on Listen for test event to put the node in listening mode and copy the webhook URL.

Forms Bridge set up
For this tutorial, we will set up a bridge with a simple contact form containing four fields: your-name, your-email, your-subject and your-message.
We won’t cover how to create the form here; simply choose one of the supported form builders to complete your form.
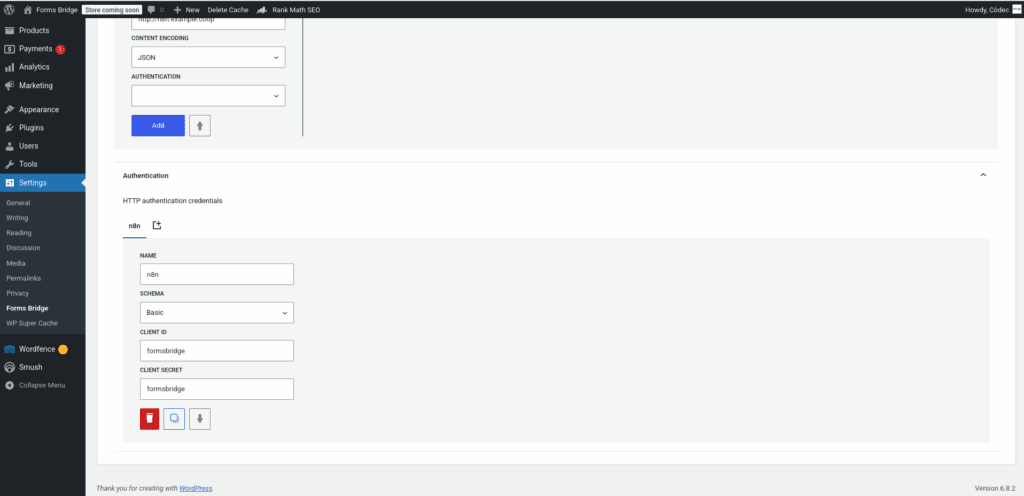
1. Register a Basic authentication credential
On the WordPress admin page, navigate to Settings > Forms Bridge > HTTP > Authentication and register a new Basic authentication credential with the username and password you set in the n8n Basic Auth credential as the Client ID and Client secret. Additionally, provide a unique name to identify it (e.g., n8n).
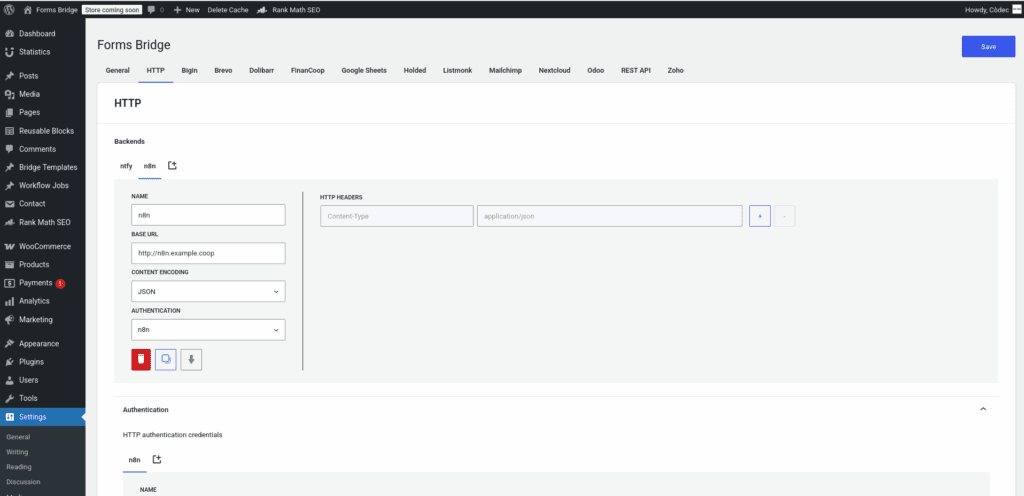
2. Register the backend connection
Next, register your n8n instance as a backend and attach the Basic credential to it. Navigate to Settings > Forms Bridge > HTTP > Backends and a new backend.
The new backend will require the following settings:
- Name: A unique name to identify the backend (e.g,
n8n). - Base URL: The URL of your n8n instance.
- Encoding schema: Select JSON as the content type of your bridge payloads.
- Authentication: Attach the Basic credential you created to the backend.
3. Set up the bridge
Once you have your backend connection ready, it only remains to set up the bridge that links the contact form with the backend.
Before proceeding, ensure that the REST API addon is enabled. Then, go to the addon tab and open the New bridge form.
The bridge setup will require the following fields:
- Name: A unique name to identify the bridge (e.g.,
n8n workflow). - Form: Select, from the available options, the simple contact form.
- Backend: Select, from the available options, n8n as the bridge backend.
- Endpoint: Specify
/webhook-test/forms-bridge-exampleas the endpoint - Method: Set POST as the bridge method.
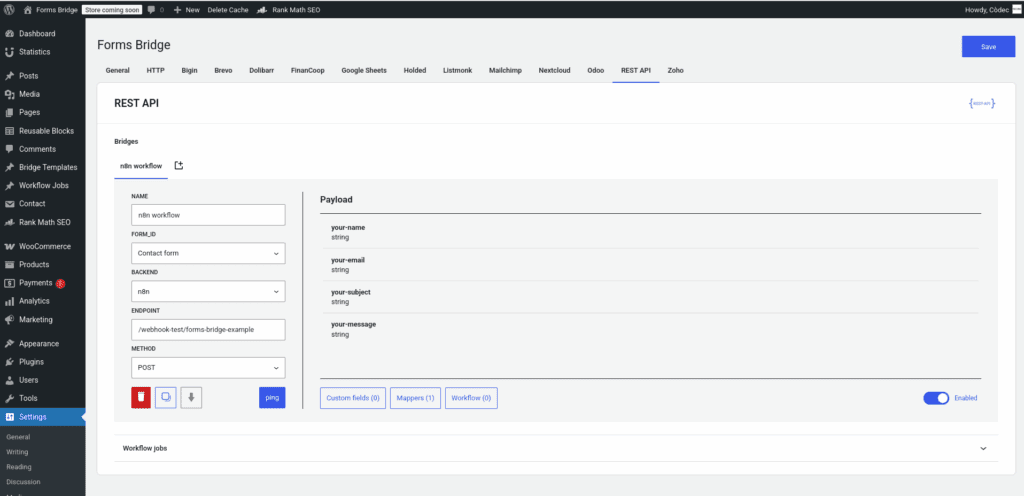
When you have filled in the form, click on Add to save the bridge setup.
Feed your webhook
With your bridge ready, and the webhook node on listen mode, you can send a sample submission to n8n to feed your workflow’s first step. This is required to provide your node with a schema. If all goes well, when you return to your n8n canvas, you will find the following information on your webhook node details.
If you have come this far, you have a ready to use bridge that links your contact form submission to a n8n workflow with a webhook as a trigger node. From this point on, you must continue to configure your workflow and take full advantage of the possibilities of n8n.