In this tutorial we will explain how to bridge your WooCommerce orders to Odoo. The resulting bridge will convert placed orders in WooCommerce to sale orders on the sales module linked to new partners.
This tutorial assumes you have an Odoo instance with access to the RPC API and, at least, the Sales module enabled.
Enable the addon
The first step is to enable the Odoo addon on the general tab of the settings page.
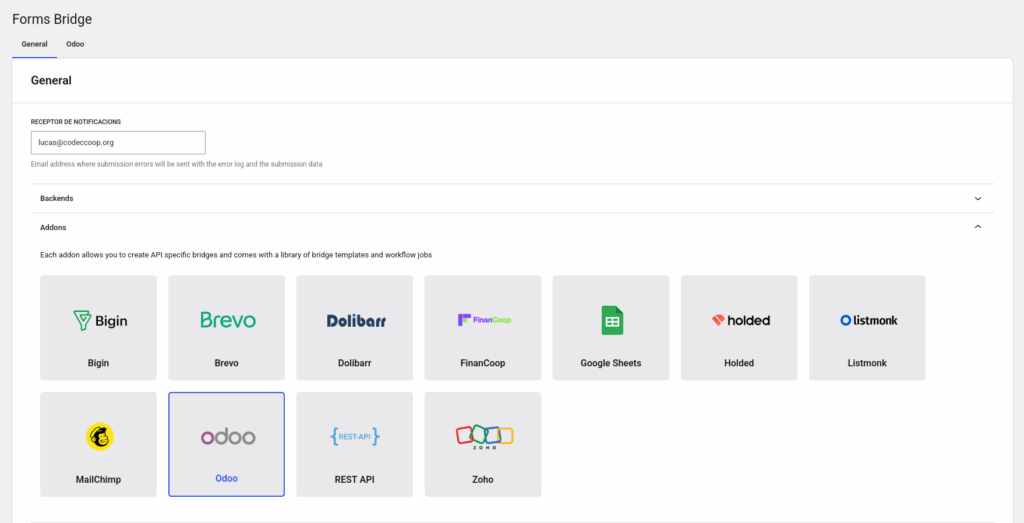
Once the addon is enabled, we can create bridges to work with the JSON-RPC API. In addition Forms Bridge offers some templates to start creating our bridges, and workflow jobs.
The template wizard
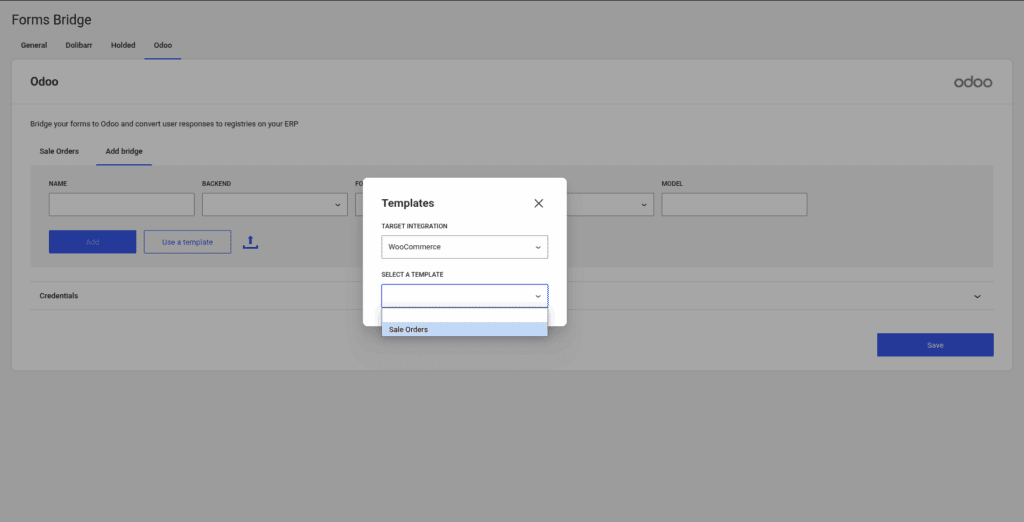
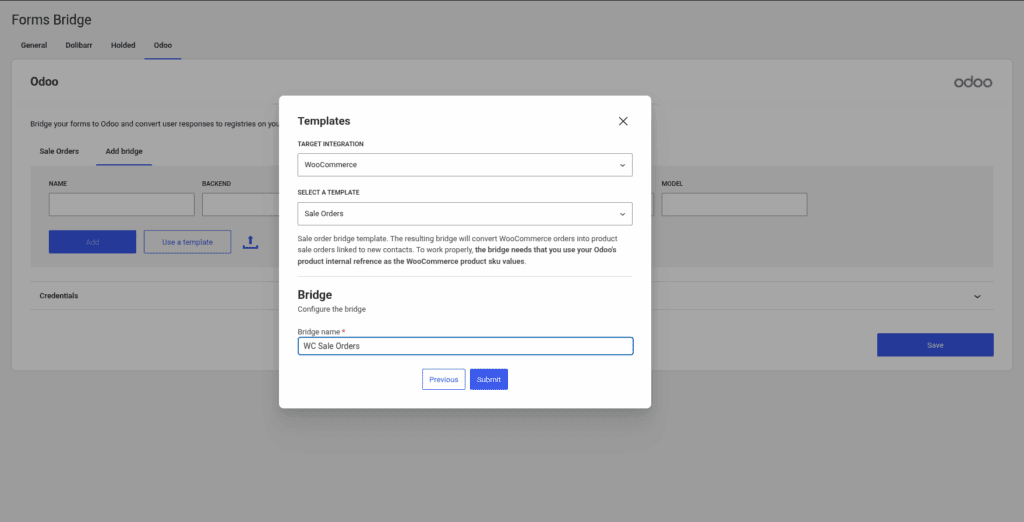
To streamline the creation process, we will use the Sale Orders template from the addon. To use it, simply go to Add bridge tab on the addon’s page and click on Use a template. After that, the template wizard will be displayed. On the templates dropdown, select the option Sale Orders.
The Sale Orders template is a WooCommerce bridge template and its only available if you have WooCommerce installed and selected as the target integration.
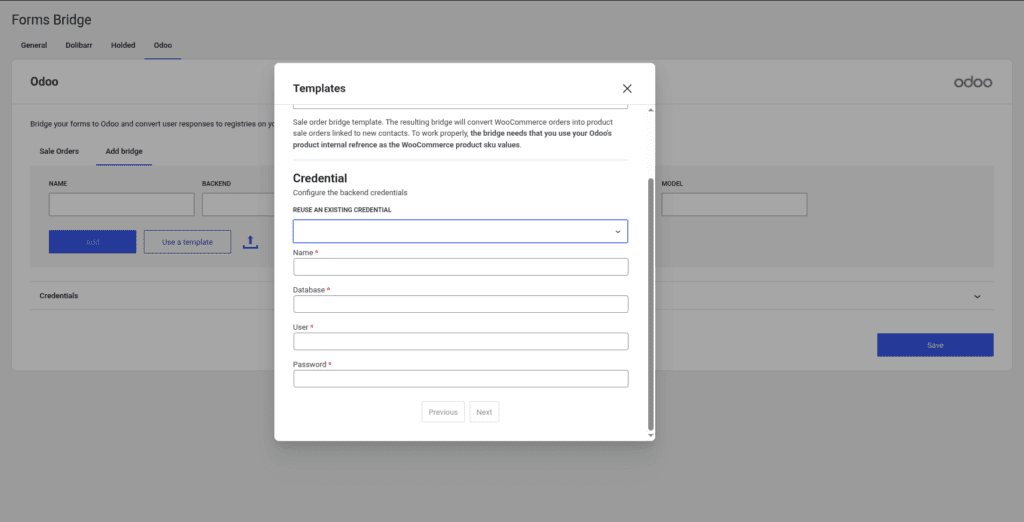
The next step is to create a new credential. The JSON-RPC API needs the name of the database you want to work with, the user email and the user password (or API key). In addition, the credential will require a unique name to identify it.
This step is only required if you already don’t have any credentials. If you’ve created a credential before, you can simply reuse it and click next.
The backend step
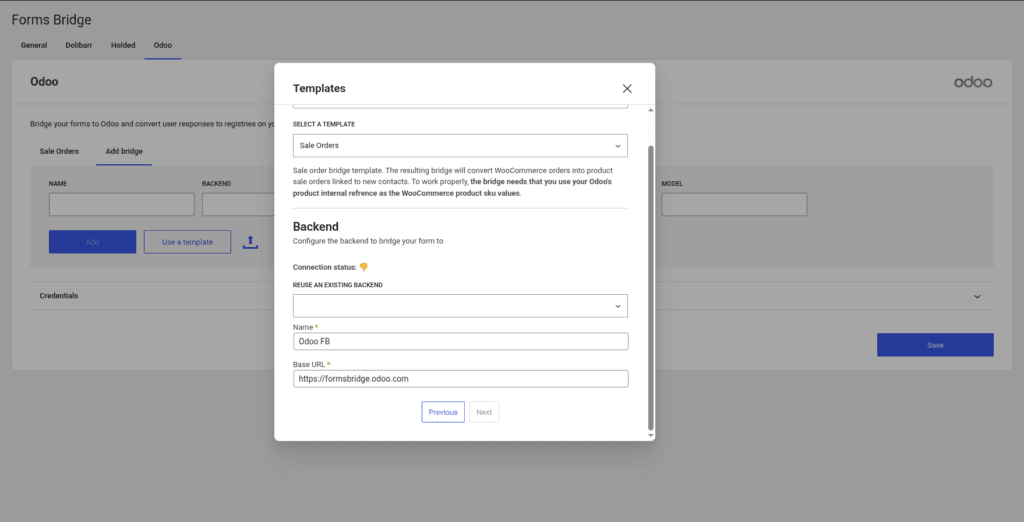
The next step on the wizard will ask us for the backend connection. Like the credential step, if you’ve configured the connection before, you can reuse an existing and go forward. The backend connection will ask us for a URL (the RPC endpoint is already known, same as the required HTTP headers). Place the URL of your Odoo instance and Forms Bridge will perform a ping to the backend to check the health of the connection. If all goes well, the template wizard will allow us to continue. If it doesn’t, please check your credentials and the URL.
The bridge step
To finish, the wizard will ask us for the bridge name (remember, it should be unique as it is the identifier). That’s all! Now click on submit and let the magic happen. Behind the curtain, Forms Bridge will create the backend connection and a new bridge that will connect the Woo Checkout form with the backend.
The bridge workflow
After using the template you will have a bridge with the following workflow:
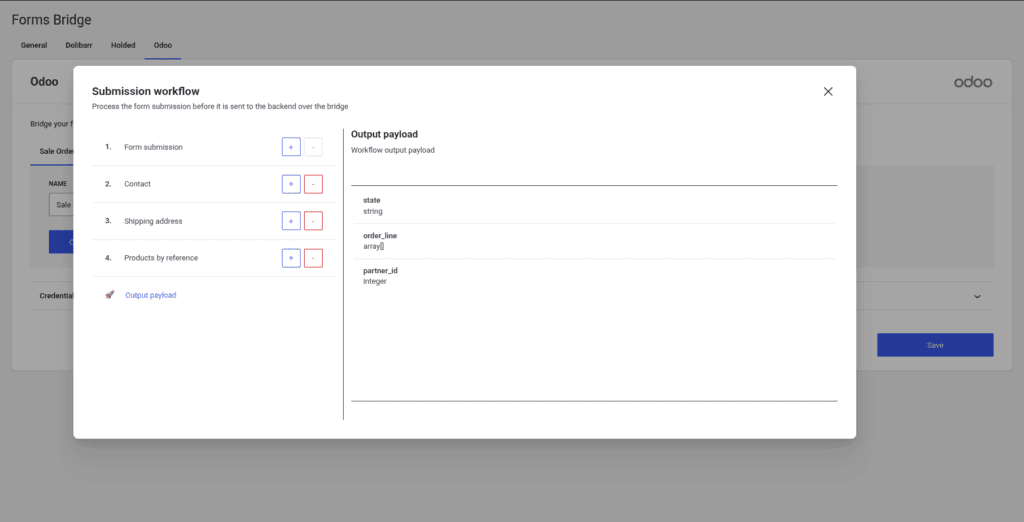
Lets see what happen on each job of the pipeline and how you can add custom configurations to the bridge:
- Form submission: This is the first step of the pipeline and allow us to apply mutation layers to the form submission. In this case, the form submission is the order data. This step is configured with a bunch of mutation layers to prune the order data and get only the required fields.
- Contact: This workflow job is the responsible to create a new partner on Odoo based on the checkout billing data. The job will searches for an existing partner by name and email and, if it does not exists, creates a new one. Once done, all the billing fields are removed from the payload and replaced with the
partner_idfield. - Shipping address: The next step on the pipeline is the creation of the shipping address. This job gets shipping fields from the payload and creates a new delivery address linked to the partner. Once done, all shipping fields are removed from the payload.
- Products by reference: This job will get the
internal_refsinternal_refsarray is populated with the product sku values of the order, one for each line, and this values are used to search products by internal reference on Odoo. If the amount of found products does not match the amount of lines, the job will through a search error.
Remember! To get this bridge working properly, you have to get your WooCommerce product SKU values synchronized with the Odoo products Internal Reference values. This fields are used as the relation between the two inventories.
To avoid search errors on the Products by reference job its important to treat sku values on WC and Internal References on Odoo as unique values.
The output of the pipeline should be a payload like this:
{
  "state": "sale",
  "partner_id": 1,
  "order_line": [
    [0, 0, {"product_id": 1, "price_unit": 24.99, "product_uom_qty": 2}]
  ]
}
Additional configuration
At this point, the bridge is ready for use, you can stop here or continue editing the bridge with custom configurations to fit your specific use case.
A good example is the delivery state of your order lines. By default, the bridge assumes that the delivery is not done automatically and will create orders with product lines without delivery information and delegates on you to update the delivery status of each line. Depending on your sale workflow, you would prefer to get your orders created as delivered. If that’s the case, you can achieve it by adding a new mutation layer to the last job of the workflow like this
| order_line[][2].product_uom_qty | order_line[][2].qty_delivered | Copy |
With this mutation, you are adding to each line on the payload a qty_delivered value as a copy of the product_uom_qty value. With this new mutation, your orders will be created on Odoo as already delivered and ready to be billed.
If you need to go further with payload mutations you always can use the forms_bridge_payload filter to mangle your bridge submissions with PHP and all of its power and flexibility. Checkout the API documentation.
To conclude, its worth to mention that you can get the same bridge setup doing it manually, but with templates you can save a lot of time! We strongly recommend you to check for templates before start creating new bridges.