Grist
Grist is an open-source, self-hostable alternative to spreadsheets that combines the simplicity of a spreadsheet with the power of a relational database, enabling real-time collaboration, customizable workflows, and automation—ideal for teams and developers.
The Grist add-on allows you to seamlessly integrate WordPress form submissions directly to your spreadsheet tables, transforming how you manage and analyze form data.

The add-on
The Grist REST API can be used to integrate your data in Grist with any external system. The API closely follows REST semantics, uses JSON to encode objects, and relies on standard HTTP codes to signal operation outcomes. To talk with this API the add-on implements a custom bridge class based on the generic REST bridge that requires Bearer credentials.
A Grist bridge will store your form submissions as entries in your Grist spreadsheets. Each field of your forms will be translated to a table column, and every form submission inserted as a new row of the table.
In addition, the add-on comes with a bridge template to create dynamic forms based on your tables.
How to use
The first step to use the add-on is to activate it in the add-ons table in the general settings tab.
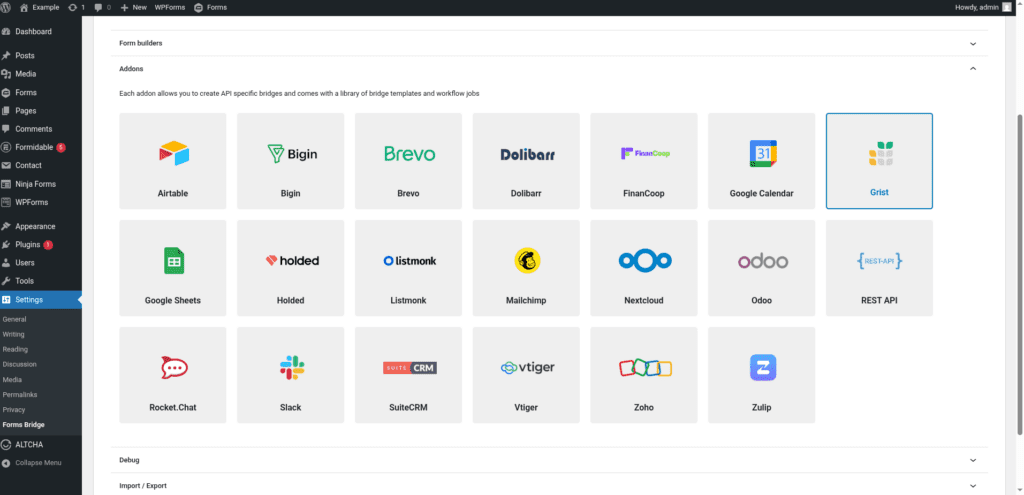
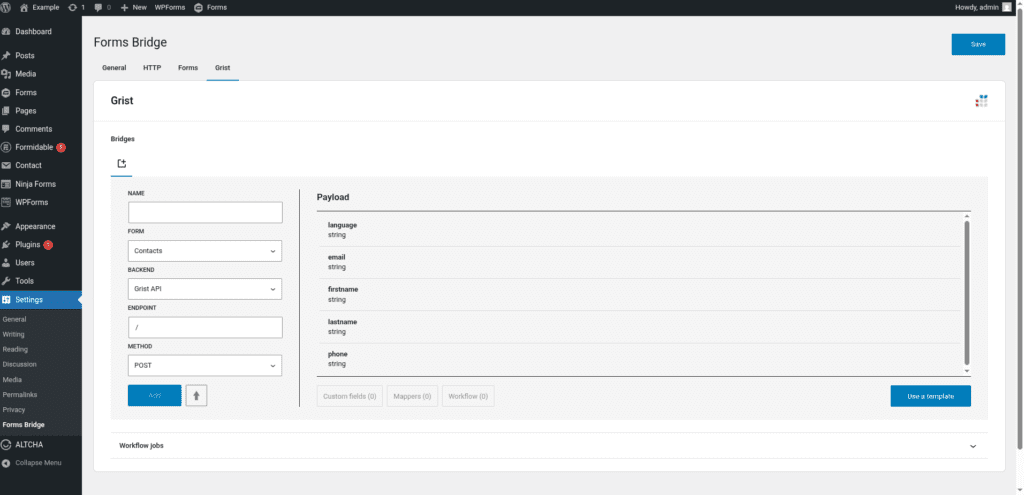
Once activated, a new tab will be visible in the settings page. If it’s your first time, it should looks like this:
The template wizard
The recommended way to set up a new bridge is to use a template as a starter point. The add-on’s template wizard will set up a new Bearer credential, a backend connection and a form, all of them linked with a new bridge.
With this setup ready, you can edit the bridge’s form to fit your requirements or manually add new forms and bridge them with the backend / credential you’ve configured on the previous step.
The template wizard will lead you through four steps:
1. Credential
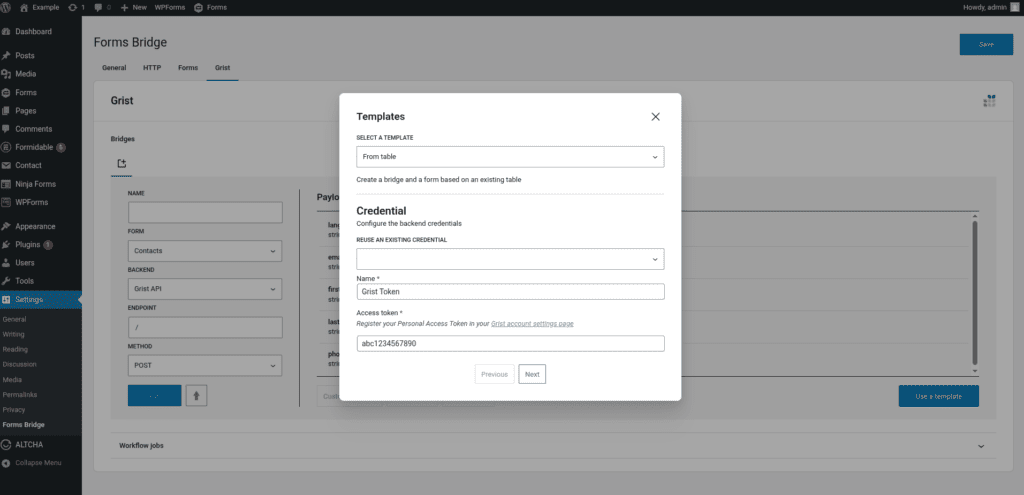
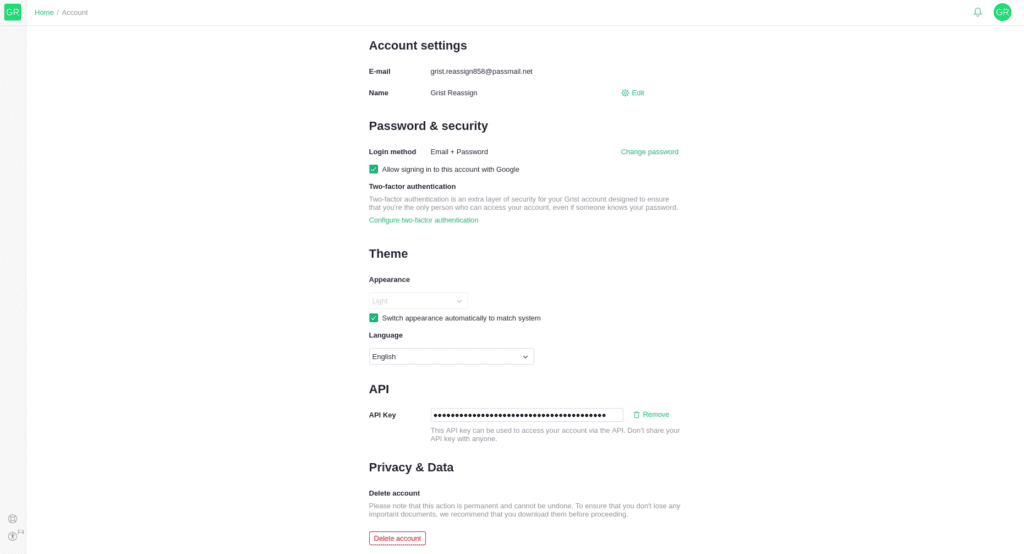
In this step, Forms Bridge will register a new Bearer credential. To set up this authentication, you have to register a new API key in your Grist account.
This API key can be used to access your account via the API. Don’t share your API key with anyone.
If you already have a Bearer credential registered, the template wizard allows you to reuse it. If you want to get multiple Grist bridges, the recommended way to proceed is to register a Bearer credential and reuse it on your bridges.
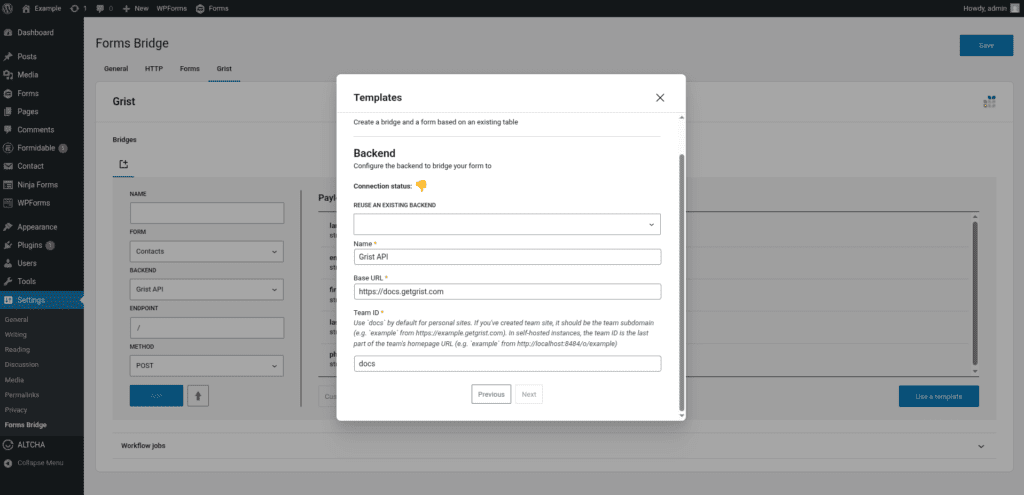
2. Backend
Grist can be self-hosted or used as a cloud service. Based on your setup, this step will require different configurations.
Start by defining a unique name to identify the backend connection. After that, you have to configure the base URL of the backend. By default the add-on will propose https://docs.getgrist.com, but you can change the URL in case you’re self hosting Grist.
The last field, the Team ID, is the identifier of your Grist site. In the cloud service of Grist it is the subdomain of your team site (e.g. example in https://example.getgrist.com). In self hosted instances, it can be extracted from the URL path (i.e. example in http://localhost:8484/o/example).
If you already have the Grist API registered as a backend, the template wizard allows you to reuse it. If you want to get multiple Grist bridges, the recommended way to proceed is to register the backend once and reuse it on your bridges.
3. Form
In this step you have to choose the title of the form the template are going to create. The add-on will create a new form with a dynamic set of fields based on the table you decide to integrate with.
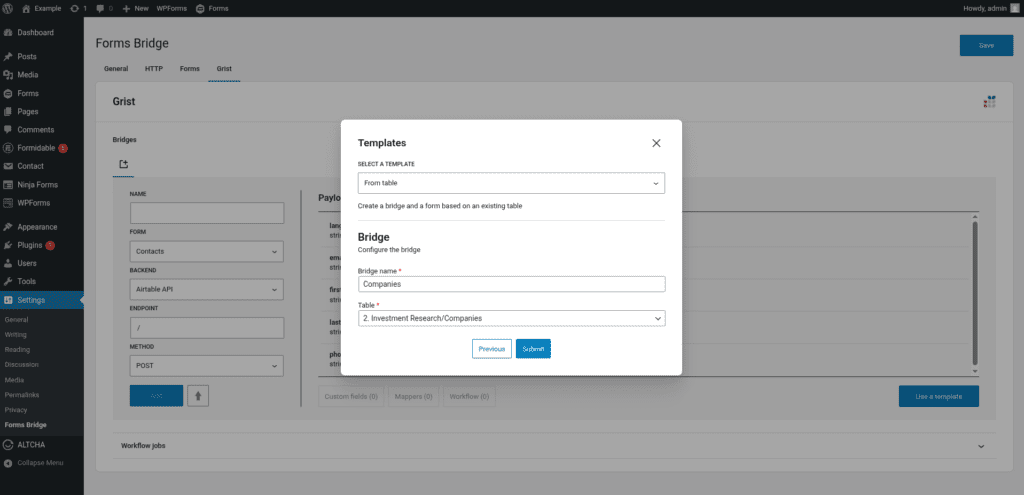
4. Bridge
In the last step of the wizard, you have to set a unique name for the new bridge and select the table you want your form to get bridged.
After that, click on submit and Forms Bridge will generate the credential, backend, form and bridge setting. It only remains to publish the new form on a public page and wait for a new form submission!
Manual set up
With templates, you can save a lot of time while configuring your bridges, but you can achieve the same result with a manual set up.
A Grist bridge will require the following components:
1. Credential
As mentioned before, the Grist API works with Bearer tokens to grant access to its resources. To solve this authentication requirement, the add-on requires you to register an API key in your Grist account.
Once you have the token, you have to go to Settings > Forms Bridge > HTTP > Authentication and register a new authentication credential. Select Bearer as the authentication schema and put the key value as the Access token field.
2. Backend
To configure the Grist API as a backend, follow this steps:
- Register a new backend with a unique name (Grist API, for example), and a URL with
https://docs.getgrist.comas value for cloud services, or the base URL of your self hosted Grist instance. - Select
JSONas the Encoding Schema - Select the Bearer credential you’ve configured on the previous step.
3. Form
The add-on supports any kind of form. Get your preferred form builder and create a new form. Once created, you can choose it as the target form to be bridged on the bridges panel of the add-on.
4. Bridge
The add-on’s bridge is an extension of the generic REST bridge. Because of this they looks so similar. Like the REST bridge, the add-on’s bridge requires a unique name, a backend, a form, an endpoint and an HTTP method.
The endpoint of a Grist bridge should be like /api/docs/{docId}/tables/{tableName}/records. The docId can be extracted from the table URL. For example, the in the URL https://docs.getgrist.com/abc123456789/Example/p/1 the baseId is “abc123456789”. The tableName parameter of the URL is the name of your table.
Despite the different methods available (GET, POST, PUT, DELETE, PATCH), the most common case is to use the POST as the bridge method to write new rows to your spreadsheets. The other available methods are useful for API introspection or to set up workflow automations, but are not designed to be used as the bridge method.
Troubleshooting
To troubleshooting your bridges you can use the plugin’s debug console from the General Settings page. Enable the debug mode and submit a sample form response to see what’s going on under the hood.
Common issues
- Authentication failures
- Verify API key
- Verify backend URL
- Missing data
- Verify table endpoints
- Verify column names
- Check field mapping
- Consider API quotas and potential costs
Add-on templates
The add-on comes packed with the following template:
From table 🔎
Create a bridge and a form based on an existing table
Supported form builders