Google APIs use the OAuth 2.0 protocol for authentication and authorization. From the multiple flows this OAuth API supports (web server, client-side, installed, and limited-input device applications), Forms Bridge supports the Web Server authentication flow with the Bearer credentials.
Either via templates or via manual set up, if you want to bridge your forms with Google services, you will have to set up a Web server OAuth client on your Google Cloud Console.
In this tutorial, we are going to show an example of how to configure a client to bridge your forms with the Google Sheets addon.
How to create an OAuth Client
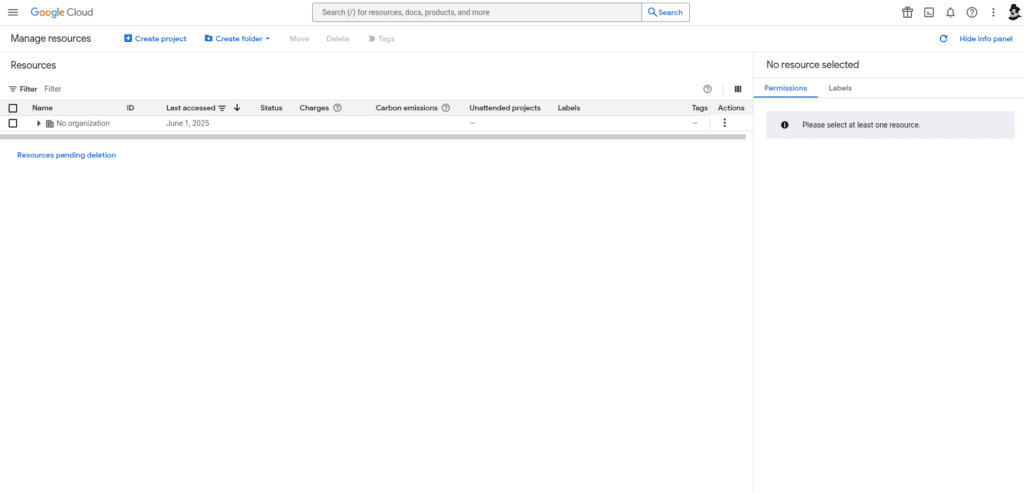
To create this kind of client, you have to go to Google Cloud Resource Manager page and create a new project (if you have not done yet so).
1. Create a project
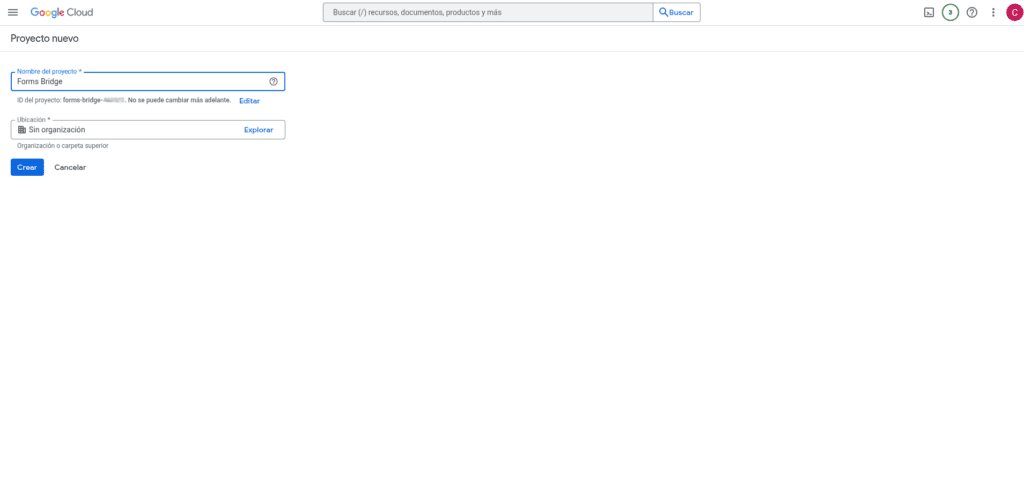
To create a new project, click on + Create project on the toolbar, open the project form and set the project name and, optionally, the owner organization.
2. Enable APIs
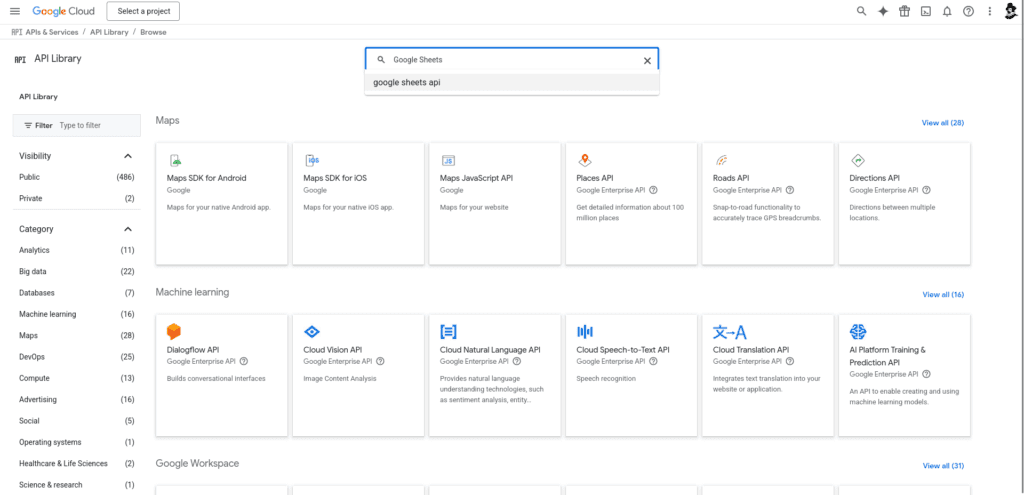
Go the project admin page and on the left side menu go to APIs and services > Enabled APIs and services and click on the + Enabled APIs and services button on the top bar to get to the APIs library. Once there, search for Google Sheets API and enable the service.
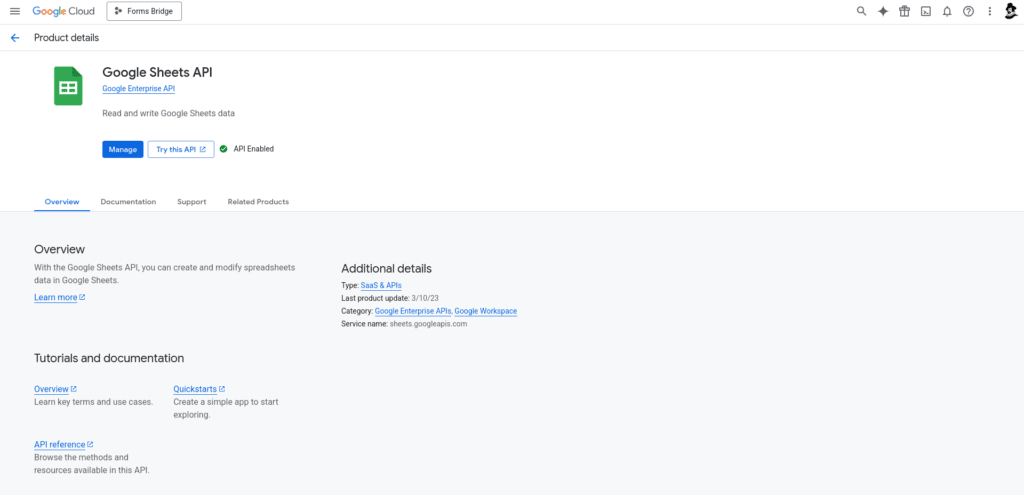
Do the same process with the Google Drive API service.
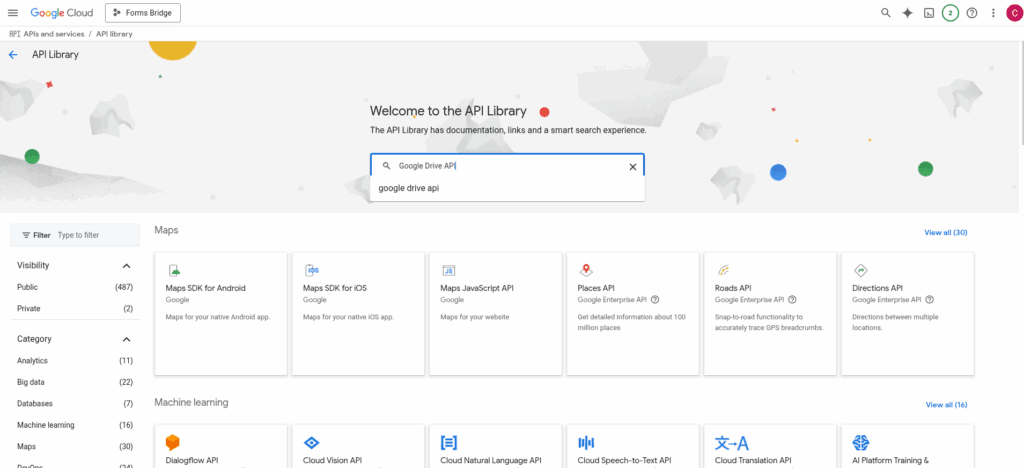
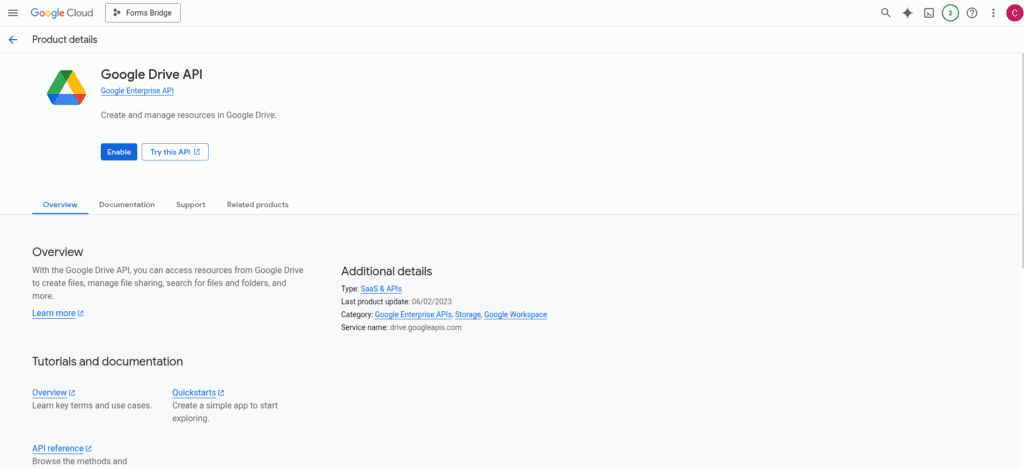
Now you have a project on Google Cloud with the Google Sheets API and Google Drive API enabled.
3. Configure OAuth consent screen
Go to APIs and services > OAuth consent screen > Overview and click on Get started.
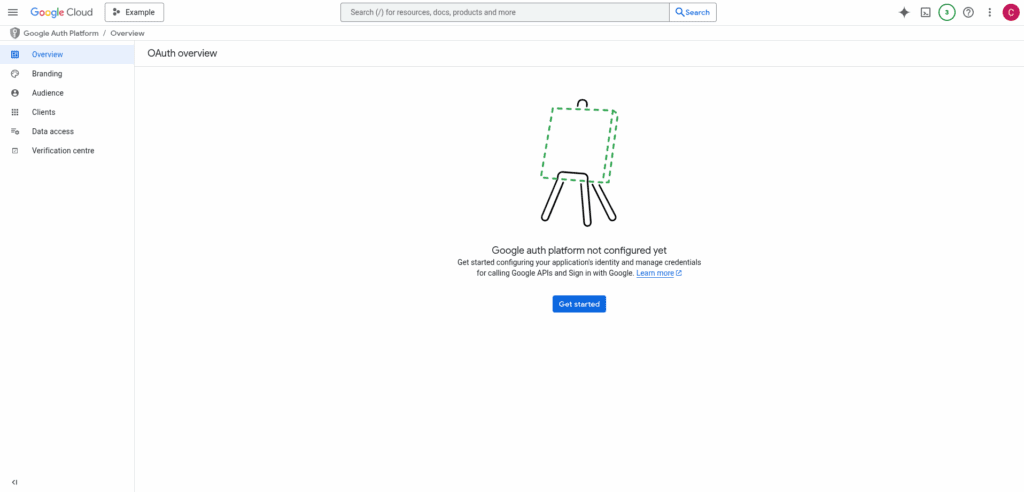
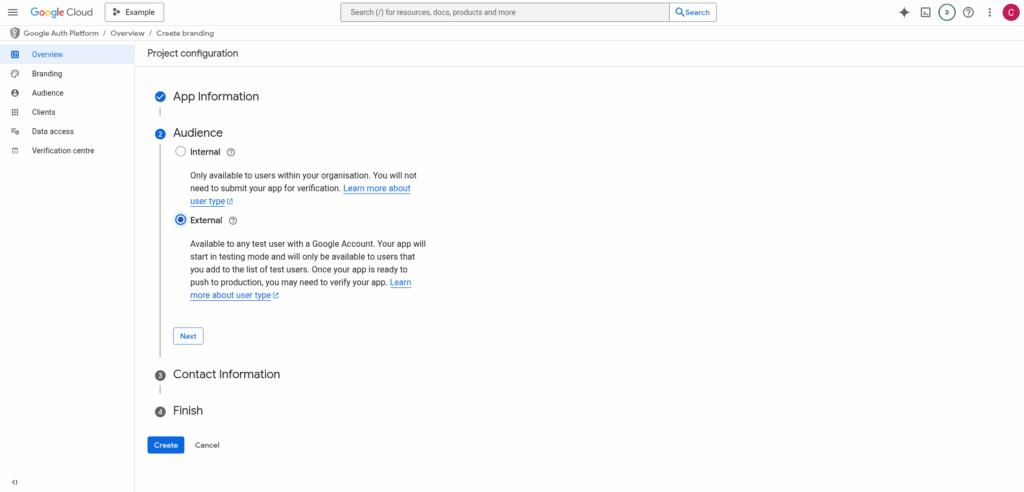
After getting started select the user type and click on the “Create” button.
With Forms Bridge as it requires authentication if you are selecting an Internal audience then you will require the same organizational domain email Id.
If you create an audience for an organization i.e example.coop then while authentication the user email id must be of the same organization i.e username@example.coop
If you are using an External audience, you would need to verify our app by creating and providing a link to a YouTube video that shows how you will use the data you access using OAuth scopes. This will be a process of 5-6 days if you provide a quick response.
It will require the following points to be considered in the video and must be in English.
- How to log into your project (ensuring that the URL bar with the client ID is clearly visible)
- How to request an OAuth token (OAuth Consent Screen/Permissions Page)
- How your project’s functionality utilizes the requested scopes
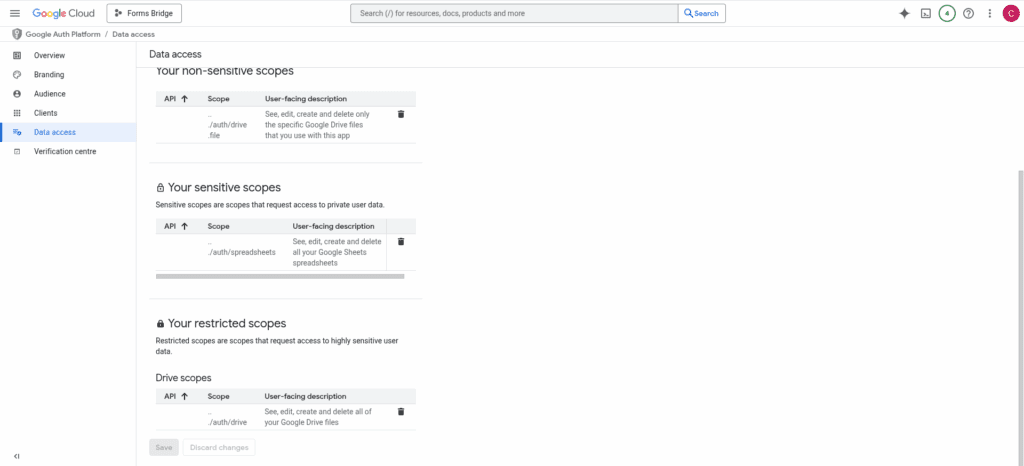
Now go to APIs and services > OAuth consent screen > Data access to configure which scopes your client will ask permissions for.
Scopes express the permissions that you request users to authorize for your app and allow your project to access specific types of private user data from their Google Account
Add sensitive scopes for Drive files and Spreadsheets as Forms Bridge have to deal with sheets and save data to them. Here are the required Scopes to enable:
Google Drive API ../auth/drive
Google Drive API …/auth/drive.file
Google Sheets API ../auth/spreadsheets
4. Credentials
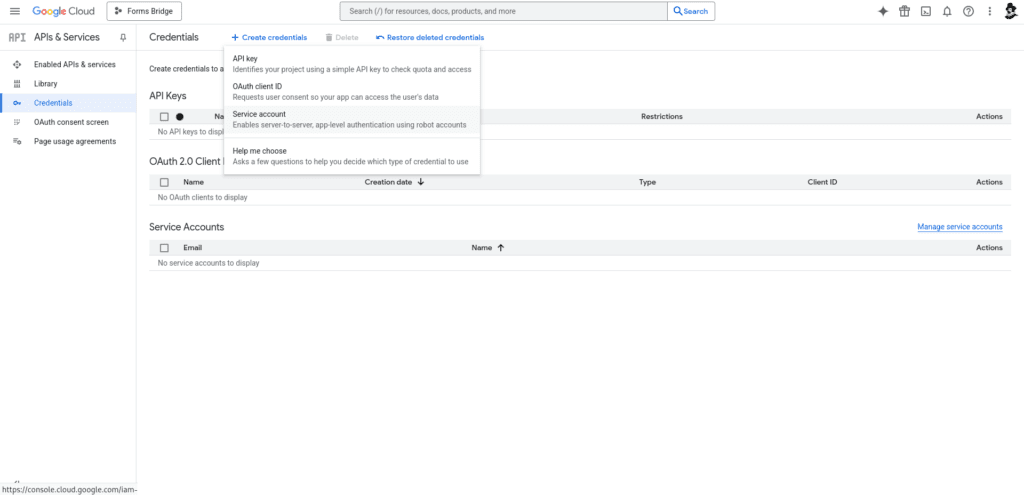
The next step is to create the credentials. Come back to your project and go to APIs and services > Credentials and click on + Create credentials button on the top bar to create a new OAuth client ID.
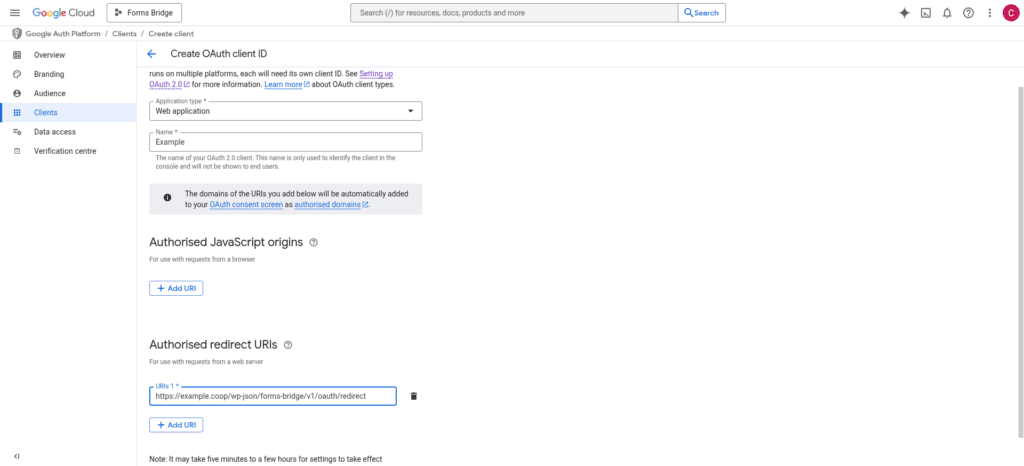
On the client creation form you have to select Web application as the type of client you want to create. In addition, the client will require a name to identify it, “Forms Bridge” for example.
To finish the setup, you have to add the https://example.coop/wp-json/forms-bridge/v1/oauth/redirect URL to the Authorized redirect URIs list of the client, replacing example.coop with your WordPress site domain.
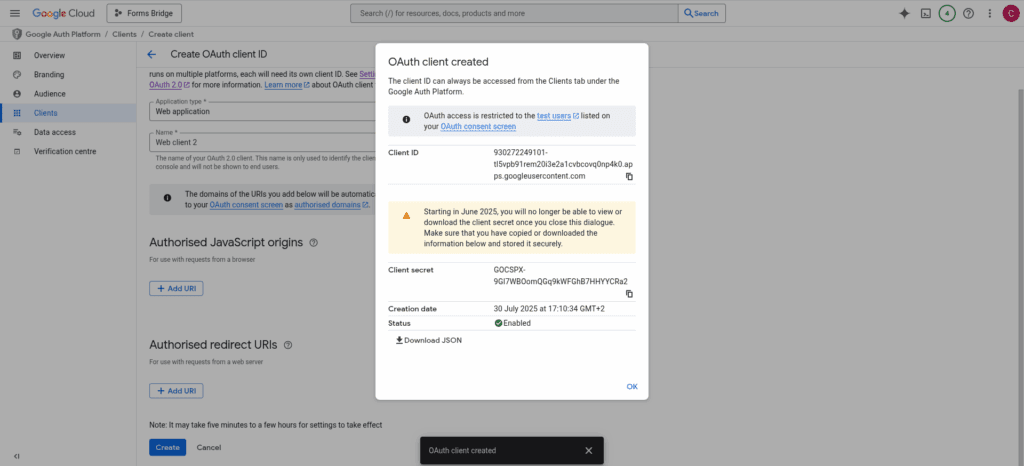
To finish, click on create and a pop-up will be displayed with your client credentials.
The client ID can always be accessed from the Clients tab under the Google Auth Platform, but the Client secret will be only visible at this moment. Make sure that you have copied or downloaded the information below and stored it securely.
Register the Bearer credential
You’re almost there! With the client id and secret you’ve created, now you have to go back to WordPress and go to Settings > Forms Bridge > HTTP > Authentication and register a new authentication credential.
Select Bearer as the authentication schema and put the Client ID and Client secret in the respective fields. For the Authorization URL, you have to set https://accounts.google.com/o/oauth2/v2 and for the Scope https://www.googleapis.com/auth/drive.readonly https://www.googleapis.com/auth/spreadsheets.
Once registered, Forms Bridge will ask you to Authorize the new credential. Click on the button and a new browser’s tab will be opened asking you for the authorization to Forms Bridge to access your account data. Click on Accept and then you will be redirected again to the HTTP tab of the plugin settings page with your credential authorized.