Bigin
Bigin is a powerful CRM solution designed to help businesses streamline sales processes, reduce turnaround times, and automate workflows. The Bigin add-on enables seamless integration of WordPress forms with Bigin’s sales pipelines and contact management.

The add-on
In Bigin, data is organized into different modules. Each module represents a specific business aspect and performs different operations to achieve a common business goal. Also, each module stores a specific type of data. This modules are available as REST-like HTTP APIs. This API use the OAuth 2.0 protocol for authentication and authorization.
To talk with this API the add-on implements a custom bridge class based on the generic REST bridge that requires OAuth credentials.
A Bigin bridge will synchronize your form submissions with your Bigin account modules. The add-on comes with a suit of templates and workflow jobs to bridge forms to the Contacts, Accounts, Deals and Meetings modules, but you’re not tied to this options: either via templates or via manual set up, you can configure your bridges to target any Bigin’s API module and to fit your custom layouts.
How to use
The first step to use the add-on is to activate it on the add-ons table on the general settings tab.
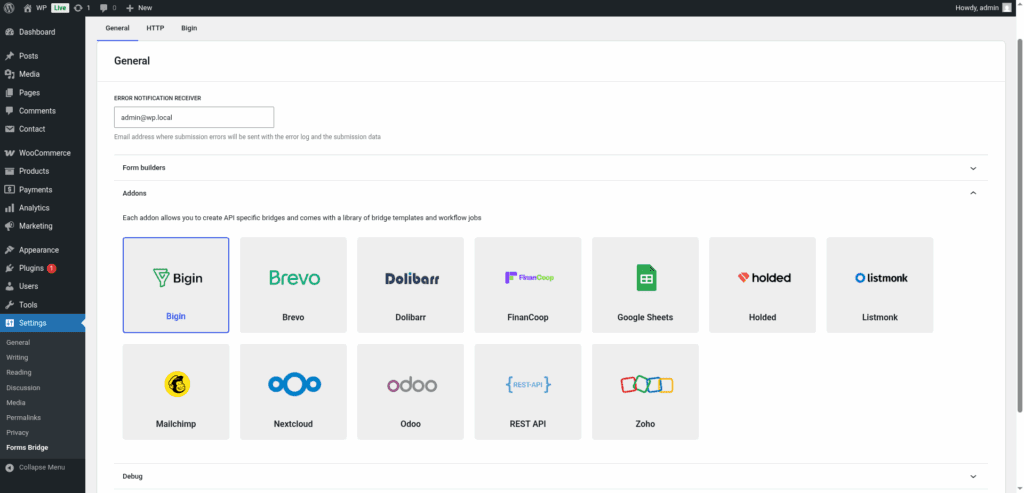
Once activated, a new tab will be visible on the settings page. If it’s your first time, it should looks like this:
The template wizard
The recommended way to set up a new bridge is to use a template as a starter point. The add-on’s template wizard will set up a new OAuth credential, a backend connection and a form, all of them linked on a new bridge.
With this setup ready, you can edit the bridge’s form to fit your requirements or manually add new forms and bridge them with the backend / credential you’ve configured on the previous step.
The template wizard will lead you through four steps:
1. Credential
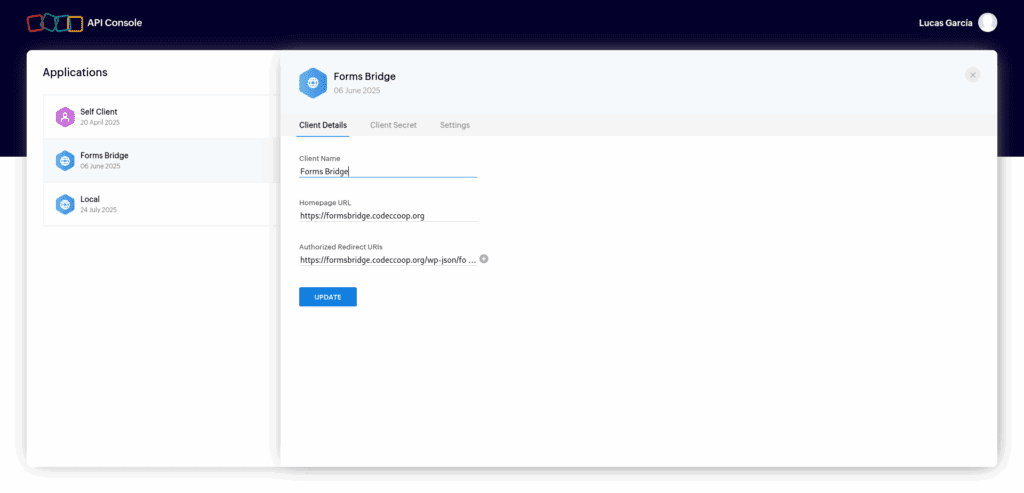
On this step, Forms Bridge will register a new OAuth credential. To set up this authentication, you have to register a new Server-based Application on the Zoho API Console and get its Client ID and Client secret.
To properly create this client, select a name to identify it and set, as the Homepage URL, the URL of your WordPress site. On the Authorized Redirect URIs place this route https://example.coop/wp-json/forms-bridge/v1/oauth/redirect replacing example.coop with your WordPress site domain.
With this two tokens, come back to WordPress and fulfill the credential step form. In addition to the Client ID and Client secret, the form will require you to select a region and a unique name to identify the credential.
Zoho has multiple data centers on different regions identified by different URLs. While choosing a region, you have to select the one that matches your account region.
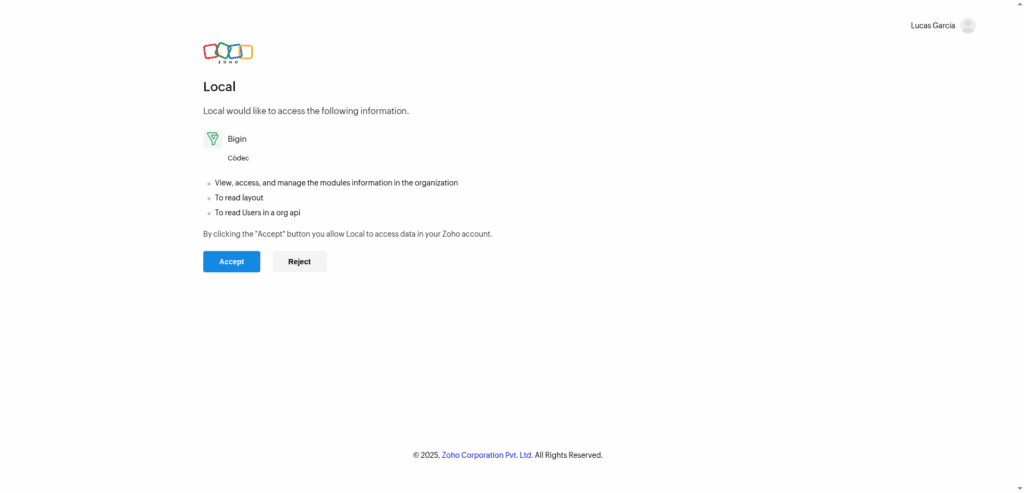
Once you’ve done with the form, the Wizard will ask you to authorize the new credential. Click on Authorize button and you will be redirected to the consent screen of Bigin. Grant access to Forms Bridge to your Bigin account data and then you will be redirected to the plugin settings page.
If you already have a OAuth credential registered, the template wizard allows you to reuse it. If you want to get multiple Bigin bridges, the recommended way to proceed is to register a OAuth credential and reuse it on your bridges.
2. Backend
The backend step requires a unique name to identify the new backend connection and to select a base URL from the available options. As in the credential step, you have to choose the one that matches the data center of your Bigin account.
If you already have the Bigin API registered as a backend, the template wizard allows you to reuse it. If you want to get multiple bridges, the recommended way to proceed is to register the backend once and reuse it on your bridges.
3. Form
In this step you have to choose the title of the form the template are going to create. If there is a compatible form, the wizard allows you to reuse the existing form and skip the form creation.
4. Bridge
On the last step of the wizard, you have to set a unique name for the new bridge. In addition to the name, and depending on the template you are using, this step will require more or less fields to be informed. The required fields will be marked with a red asterisk
After that, click on submit and Forms Bridge will generate the credential, backend, form and bridge setting. It only remains to publish the new form on a public page and wait for a new form submission!
Manual set up
With templates, you can save a lot of time while configuring your bridges, but you can achieve the same result with a manual set up.
A Bigin bridge will require the following components:
1. Credential
As mentioned before, the Bigin API implements the OAuth 2.0 schema to grant access to its resources. To solve this authentication requirement, the addon requires you to register a OAuth type of credential with the credentials of Server-based Application from the Zoho API Console.
To properly create this client, select a name to identify it and set, as the Homepage URL, the URL of your WordPress site. On the Authorized Redirect URIs place this route https://example.coop/wp-json/forms-bridge/v1/oauth/redirect replacing example.coop with your WordPress site domain.
Once you got the Client ID and Client secret of the OAuth client, you have to go to Settings > Forms Bridge > HTTP > Authentication and register a new authentication credential.
Select OAuth as the authentication schema and put the Client ID and Client secret in the respective fields. For the Authorization URL, you have to set https://accounts.zoho.com/oauth/v2, and ZohoBigin.modules.ALL,ZohoBigin.settings.layouts.READ as the value for the Scope.
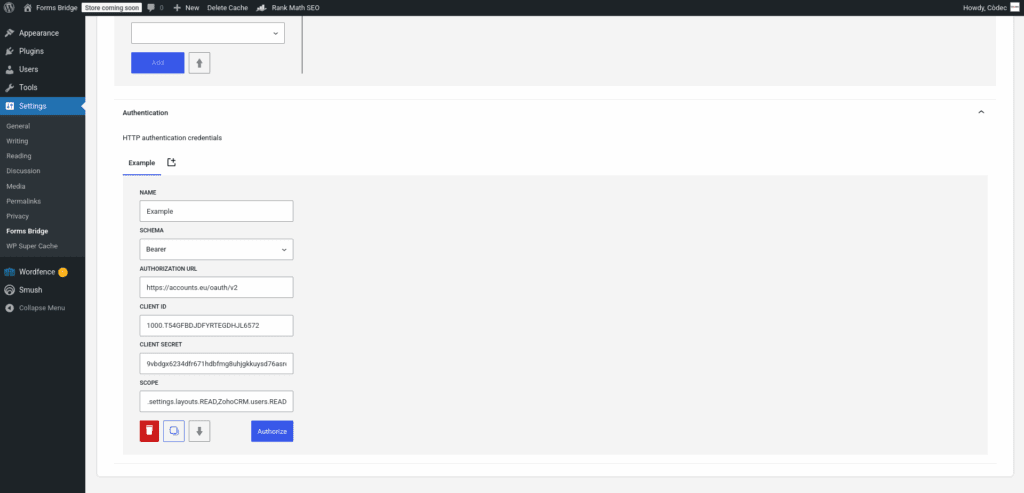
This is an example of an authentication credential. In your case, the Authorization URL may vary based on the data center of your account, or maybe you want to set up a bridge which needs more or less scope privileges.
Once registered, Forms Bridge will ask you to Authorize the new credential. Click on the button and a new browser’s tab will be opened asking you for the authorization to Forms Bridge to access your account data. Click on Accept and then you will be redirected again to the HTTP tab of the plugin settings page with your credential authorized.
2. Backend
To configure the Bigin API as a backend follow this steps:
- Register a new backend with a unique name (Bigin API, for example)
- Set the backend URL to
https://www.zohoapis.com - Select
JSONas the Encoding Schema - Add
Acceptas an HTTP header withapplication/jsonas value. - Select the OAuth credential you’ve configured on the previous step
The last part (TLD) of the URL may change depending on your geographic location. Zoho has multiple data centers on different regions identified by different URLs. Check that your backend URL ends the same as your dashboard URL. See the available data centers and the serviced regions.
3. Form
Get your preferred form builder and create a new form. Once created, you can choose it as the target form to be bridged on the bridges panel of the addon. If your form fields does not match the desired API module’s layout, you can use bridge’s field mappers to rename them.
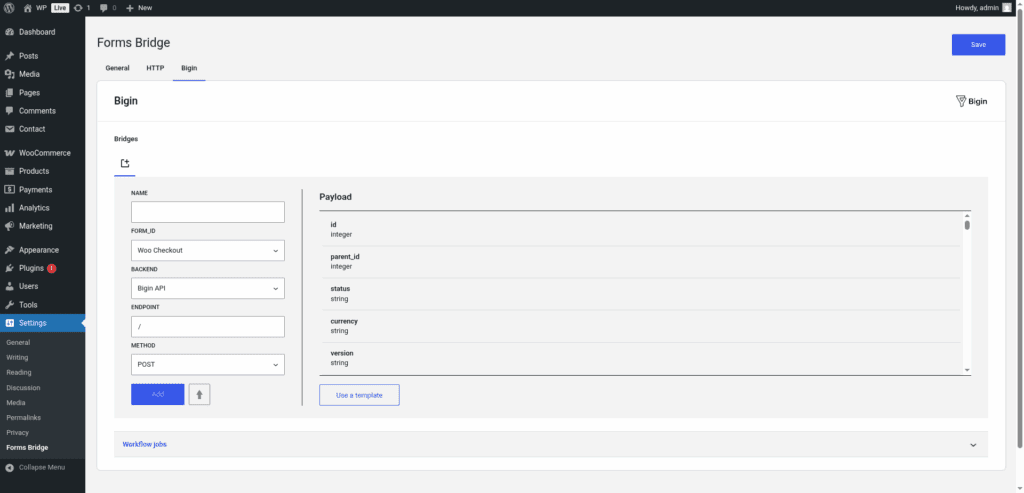
4. Bridge
The addon’s bridge is an extension of the generic REST bridge. Because of this they looks so similar. Like the REST bridge, the addon’s bridge requires a unique name, a backend, a form, an endpoint and an HTTP method.
The bridge endpoint has to exists on the Bigin API. To get a comprehensive list of the available endpoints you can check the official documentation. For example, to get your contact form bridged you have to set the bridge endpoint to /bigin/v2/Contacts.
The bridge allows you to use 4 HTTP methods (GET, POST, PUT, DELETE). In most cases you only want to use the POST method as it is the standard method to write entries on a system through a REST API.
Troubleshooting
To troubleshooting your bridges you can use the plugin’s debug console from the General Settings page. Enable the debug mode and submit a sample form response to see what’s going on under the hood. Take a look to our tutorial about how to use the debug console.
Common issues
- Authentication failures
- Verify OAuth credentials
- Check scope permissions
- Confirm data center URL
- Missing data
- Validate field mappings
- Validate module-specific layouts
Templates
The addon comes packed with the following templates:
Company Contact 🔎
Contact form template. The resulting bridge will convert form submissions into contacts linked to company accounts.Contacts 🔎
Contact form template. The resulting bridge will convert form submissions into contacts.Deals 🔎
Leads form templates. The resulting bridge will convert form submissions into deals on the sales pipeline linked new contacts.Meetings 🔎
Meetings form template. The resulting bridge will convert form submissions into events on the calendar linked to new contacts.Contacts 🔎
Contact form template. The resulting bridge will convert woocommerce customers into contacts.
Workflow jobs
The addon comes packed with the following workflow jobs:
Account name 🔎
Search for an account by name or creates a new if it does’t exists and replace the name by the ID on the payloadAppointment participant 🔎
Search for a contact or creates a new one and sets its ID as appointment participantContact name 🔎
Search for a contact by email or creates a new if it does’t exists and replace the name by the ID on the payloadAppointment dates 🔎
Sets appointment start and end time from “date” and “duration” fieldsFormat date fields 🔎
Gets date, hour and minute fields and merge its values into a date with format Y-m-d H:M:SISO2 country code 🔎
Gets the ISO2 country code from country names and replace its valueISO3 country code 🔎
Gets the ISO3 country code from country names and replace its valueSkip submission 🔎
Skip submission if condition is not truthy
Supported form builders