Brevo
Brevo (formerly Sendinblue) is a comprehensive cloud-based marketing communication platform offering email marketing, marketing automation, and CRM solutions. The Brevo add-on enables seamless integration of WordPress forms with Brevo’s mailing lists and sales pipelines.
The add-on
The Brevo’s REST API allows you to programmatically execute a wide range of code operations which are also available through the user interface. To talk with this API, the add-on works with an extension of the generic REST bridge class.
A Brevo bridge will synchronize your form submissions with your Brevo’s dashboard. The add-on comes with a suit of templates and workflow jobs to bridge forms to your mailing lists, eCommerce sales and deals pipelines, but you’re not tied to this options: either via templates or via manual set up, you can configure your bridges to target any API endpoint and to fit your contacts’ custom fields.
How to use
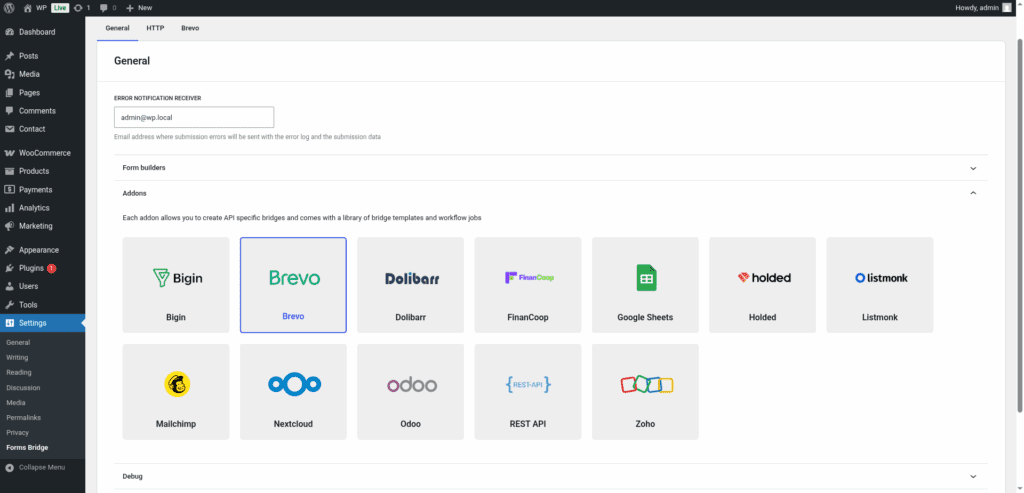
The first step to use the add-on is to activate it on the add-ons table on the general settings tab.
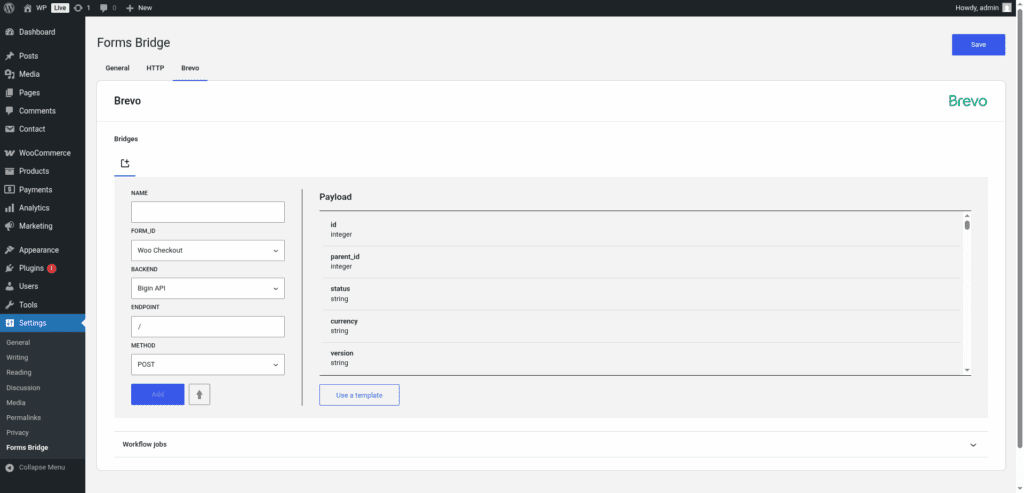
Once activated, a new tab will be visible on the settings page. If it’s your first time, it should looks like this:
The template wizard
The recommended way to set up a new bridge is to use a template as a starter point. The add-on’s template wizard will set up a new backend connection and a form, both linked on a new bridge.
With this setup ready, you can edit the bridge’s form to fit your requirements or manually add new forms and bridge them with the backend you’ve configured on the previous step.
The template wizard will lead you through three steps:
1. Backend
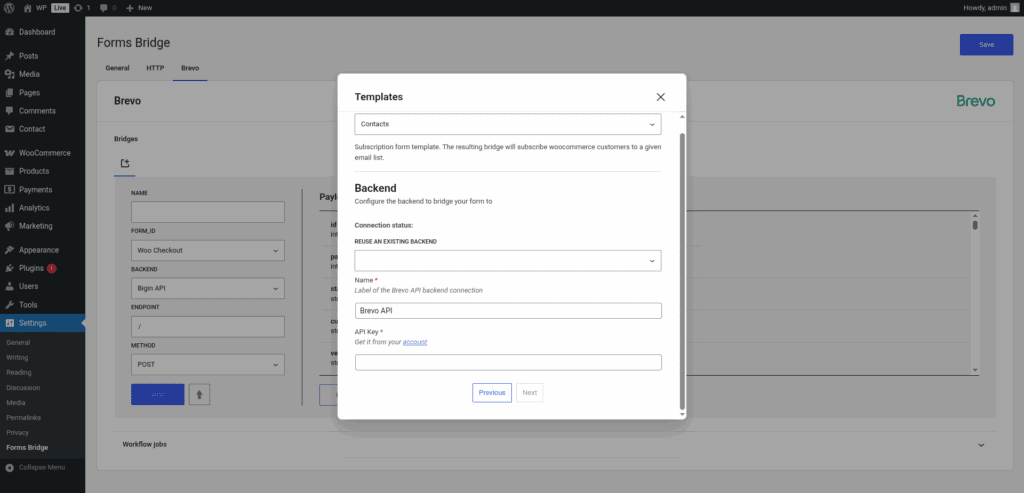
The backend step will require you to set a unique name to identify the new connection and an API key.
To generate an API key go to SMTP & API settings on your dashboard. Under the API keys tab, click Generate a new API key and create a new key. The key requires an name, for example “Forms Bridge”.
If you already have the Brevo’s REST API registered as a backend, the template wizard allows you to reuse it. If you want to get multiple bridges, the recommended way to proceed is to register the backend once and reuse it on your bridges.
2. Form
In this step you have to choose the title of the form the template are going to create. If there is a compatible form, the wizard allows you to reuse the existing form and skip the form creation.
3. Bridge
On the last step of the wizard, you have to set a unique name for the new bridge. In addition to the name, and depending on the template you are using, this step will require more or less fields to be informed. The required fields will be marked with a red asterisk
After that, click on submit and Forms Bridge will generate the backend, form and bridge setting. It only remains to publish the new form on a public page and wait for a new form submission!
Manual set up
With templates, you can save a lot of time while configuring your bridges, but you can achieve the same result with a manual set up.
A Brevo bridge will require the following components:
1. Backend
Before registering the backend, you should create an API key.
To generate an API key going to SMTP & API settings on your dashboard. Under the API keys tab, click Generate a new API key and create a new key. The key requires an name, for example “Forms Bridge”. The key value should looks like a long random string like xkeysib-7EFZb9cBgC9Rwc9nqXDE3g3f1QuN6i14prCkZwsLFv62odP5q4i8iiMN9g5GYJA96ULnveVPcquz1oXLDh.
With your API key on the clipboard, go to Settings > Forms Bridge > HTTP > Backends on your WordPress admin page and follow this steps:
- Add a new backend with a unique name (Brevo API, for example)
- Set the URL to
https://api.brevo.com - Select
JSONas the Encoding Schema - Add
Acceptas an HTTP header withapplication/jsonas value - Add
api-keyas an HTTP header with your API key as value
2. Form
Get your preferred form builder and create a new form. Once created, you can choose it as the target form to be bridged on the bridges panel of the add-on. If your form fields does not match the desired API endpoint schema, you can use bridge’s field mappers to rename them.
3. Bridge
The add-on’s bridge is an extension of the generic REST bridge. Because of this they looks so similar. Like the REST bridge, the add-on’s bridge requires a unique name, a backend, a form, an endpoint and an HTTP method.
The bridge endpoint has to exists on the REST API. To get a comprehensive list of the available endpoints you can check the official documentation. For example, to get your contact form bridged to your mailing lists you have to set the bridge endpoint to /v3/contacts.
The bridge allows you to use 4 HTTP methods (GET, POST, PUT, DELETE). In most cases you only want to use the POST method as it is the standard method to write entries on a system through a REST API.
Troubleshooting
To troubleshooting your bridges you can use the plugin’s debug console from the General Settings page. Enable the debug mode and submit a sample form response to see what’s going on under the hood. Take a look to our tutorial about how to use the debug console.
Common issues
- API connection failures
- Verify API key
- Confirm API key permissions
- Whitelist your WordPress IP on the security dashboard
- Missing Data
- Validate field mappings and contacts custom fields
- Verify API endpoint schemas
- Ensure consent and opt-in settings
Templates
The add-on comes packed with the following templates:
Companies 🔎
Contact form template. The resulting bridge will convert form submissions into companies linked to new contacts.Company deals 🔎
Quotation form templates. The resulting bridge will convert form submissions into deals on the sales pipeline linked new companies.Contacts DOI 🔎
Subscription form template. The resulting bridge will convert form submissions into new list subscriptions with a double opt-in confirmation check.Contacts 🔎
Subscription form template. The resulting bridge will convert form submissions into new list subscriptions.Deals 🔎
Leads form templates. The resulting bridge will convert form submissions into deals on the sales pipeline linked new contacts.Subscription DOI 🔎
Subscription form template. The resulting bridge will subscribe woocommerce customers to a given email list with a double opt in check.Contacts 🔎
Subscription form template. The resulting bridge will subscribe woocommerce customers to a given email list.Woo Orders 🔎
Sale order bridge template. The resulting bridge will synchronize WooCommerce with the Brevo eCommerce module.
Workflow jobs
The add-on comes packed with the following workflow jobs:
Country phone code 🔎
Get a country by name and adds its phone prefix as the “countryCode” field on the payloadLinked company 🔎
Creates a new company and inserts its ID in the linkedCompaniesIds array field of the payloadLinked contact 🔎
Creates a new contact and inserts its ID in the linkedContactsIds array field of the payloadSkip subscription 🔎
Skip subscription if the brevo field is not trueSync woo products 🔎
Synchronize WooCommerce orders products with the eCommerce module of BrevoFormat date fields 🔎
Gets date, hour and minute fields and merge its values into a date with format Y-m-d H:M:SISO2 country code 🔎
Gets the ISO2 country code from country names and replace its valueISO3 country code 🔎
Gets the ISO3 country code from country names and replace its valueSkip submission 🔎
Skip submission if condition is not truthy
Supported form builders